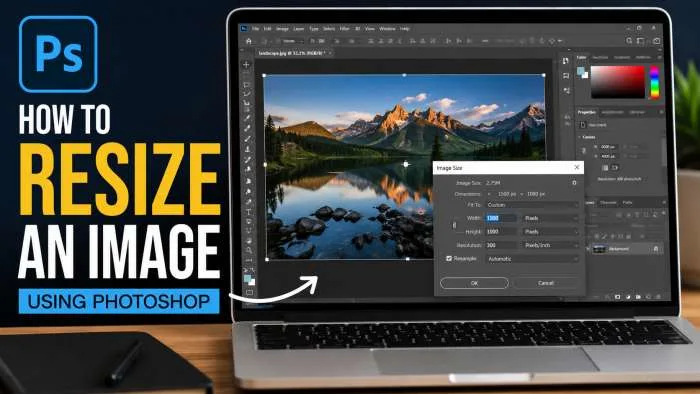
To resize an image in Photoshop: Open your picture in Adobe Photoshop and click the top menu bar. Click on Image, and then choose Image Size from the drop-down menu. You will see a new setings window pop up that will allow you to enter width and height in either pixels, inches or percentage. Be sure to use the chain link icon to set the aspect ratio, to avoid image distortion or stretching. Last but not least, select your desired sample and leave your information crisp and hit OK to preserve your changes in real time.
Why Changing Graphic Dimensions Matters for Your Projects?
People everywhere mess up their web pages because of huge photo files. If you snap a photo on your phone or camera, it is way too big for a regular blog post. Uploading massive image files directly makes your site run super slow. Web visitors hate waiting around, and honestly, Google penalizes slow pages by burying them deep in search results.
Shrinking your files down fixes this headache right away. You get to save tons of hard drive storage space. Plus, your online design layouts will look clean and sharp. Once you figure out file sizes, you can build whatever you want without slowing things down.
You may also read :- How to Use Adobe Photoshop Express for Photo Editing Like a Pro
How to Resize an Image Using Photoshop: Step-by-Step Guide?
Opening Your Document and Finding the Image Size Settings
Let us walk through this from scratch. Open Adobe Photoshop on your computer. Look way up at the top left corner, click File, then hit Open. Go find your file, double-click the thumbnail, and it will load onto your main work screen.
Now, look up at that top bar again. See the word Image sitting right next to Edit? Click it. A long menu drops down. Go ahead and click Image Size. If you like using quick keyboard keys, just hold down Control + Alt + I on a regular PC or hit Command + Option + I if you are on a Mac.
Understanding the Dimensions Box Options
When that box pops open, a bunch of numbers will show up. Those numbers tell you your current screen pixel dimensions. Right next to the width and height boxes, there is a tiny drop-down menu. You can click that to switch your units around whenever you want.
- Pixels: Great for normal blogs, Facebook posts, and smartphone apps.
- Inches and Centimeters: Use these when you need to print out real paper flyers or photos.
- Percent: Super handy when you just want to make an image exactly half size or double the size.
Resize an Image in Photoshop Without Losing Quality
The Secret to Keeping Your Photos Sharp and Clear
When novices resize their images, they often end up getting confused with blurry or out-of-order images. In Photoshop, in order to do something without any loss of quality, one must know how the pixels behave. Pixels are tiny colored squares that are combined to form your picture just like the pieces of a puzzle.
Photoshop discards additional color blocks when you reduce the size of an image; as a result, the file size shrinks. However, when you look at a very small picture, and enlarge it to a very large size, the computer has to take a wild guess. Invents new pixels for no reason whatsoever, creating blocky, poor-looking results.
"Keep your big master files safe in a separate folder. Always edit a copy so you never ruin your original high-resolution shot by mistake." — Graphic Designer, Marcus Vance
Selecting the Right Resampling Method
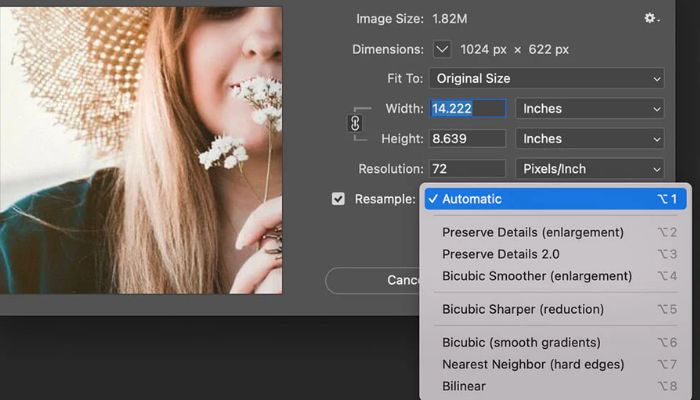
Look down at the very bottom of that image size panel. You will see a tiny checkbox labeled Resample. This setting acts like the brains of the operation. It tells the software exactly how to calculate the colors when things grow or shrink. Click that drop-down option to see your choices.
How to Resize an Image Using Photoshop for Crystal Clear Prints?
When you make an image smaller, click Bicubic Sharper from that bottom list. This choice keeps the fine lines around your shapes nice and crisp so things do not look fuzzy. If you are stretching a small photo to be much larger, pick Bicubic Smoother or click Preserve Details 2.0 to stop weird digital grain from ruining the view.
If you plan to print your image onto paper, type 300 into the Resolution box. For normal web pages, emails, or phone screens, type 72 into that box. Low resolution keeps files small so they load fast.
How to Resize an Image in Photoshop to Fit a Frame?
Adjusting Your Canvas for Physical Mockups
At times, you may not want to resize your photo layer. Perhaps you simply need to know how to resize an image in Photoshop that will fit into a frame or particular square template. To do that without changing the shape of your photo, use the Canvas Size option.
Click on the top bar and select Image and then Canvas Size, rather than Image Size. This tool changes the size of the background workspace behind your photo. It allows you to resize the picture without affecting the dimensions of the space you move the content in.
Using the Free Transform Tool for Quick Layer Adjustments
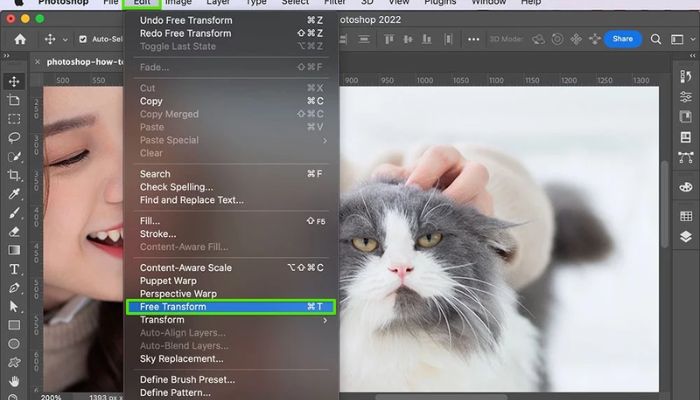
Say you want to drop a small photo inside a digital picture frame layout. You can use a command called Free Transform to scale that single layer by hand. First, click on that photo layer inside your layers panel on the right side of your screen.
Now, hit Control + T on your keyboard, or press Command + T if you use a Mac. A thin box with little square corner handles will appear around your layer right away.
Dragging Handles Safely Without Distorting Shapes
Use the mouse to drag one of those corner handles in towards its center to reduce the size or drag it outwards to increase the size. Current Photoshop versions now automatically lock proportions when you use them. This way, you won't have your subjects appearing too tall or too skinny.
In that case, use a previously released software by dragging those corners by pressing the Shift key. This makes the shape remain balanced. If you like the fit in your frame, press Enter to set the fit.
Also read :- How To Use Photoshop Basics
Best Practices for Saving and Exporting Your Graphic Files
Choosing the Correct File Format
When you finish changing your sizes, you need to save your file the right way. Go up to File, hover your mouse over Export, and click Export As to open your savings options.
- JPEG: Use for standard color photographs – will result in smaller file sizes with good colors.
- PNG: To maintain readability of graphic fine details and/or a clear, see-through background, use PNG.
- WebP: It's the optimal choice for internet blogs at present, as it provides you with small sized file sizes and a high level of clarity.
Common Mistakes to Avoid During Your Design Workflow
Overwriting Your Original High-Resolution Files
Do not just hit the standard Save button after you shrink a giant camera file down to a tiny web thumbnail. If you do that, you overwrite your original master file forever and lose all those great details. Always use Save As or the Export menu to create a fresh, separate file copy.
Forgetting to Check the Aspect Ratio Lock Icon
If your pictures look all stretched out like a weird funhouse mirror, you probably turned off the link option. Look for the little chain link icon sitting right between the width and height boxes. Make sure that chain looks connected before you type any new numbers.
Frequently Asked Questions
Can I make a small low-quality picture look amazing at giant print sizes?
No, you cannot really create clean details out of thin air. Photoshop has smart tools to help clean up rough edges, but starting your work with a big, clear photo always gives you the best final print.
How can I resize images in Photoshop without cutting out any portion of the image?
Never use the Crop Tool on the left Toolbar, but always the main image size option under the upper image Menu. The Image Size tool will resize your entire image by a uniform amount and will not remove any parts of the image.
What resolution should I use for regular phone screens?
Keep your resolution set to 72 pixels per inch for digital screens. This keeps your image files light and quick without losing any visible quality on mobile devices or computer monitors.