This photoshop layer tutorial helps you fix photos without breaking the original image. Think of layers as clear plastic sheets stacked on your desk. You can draw lines, type words, or paste pictures onto one sheet, and the other sheets underneath stay totally safe. If you cannot find your workspace controls, just hit the F7 key to use the show layers in Photoshop shortcut. This single button opens up the panel where you stack, blend, and organize your whole project safely.
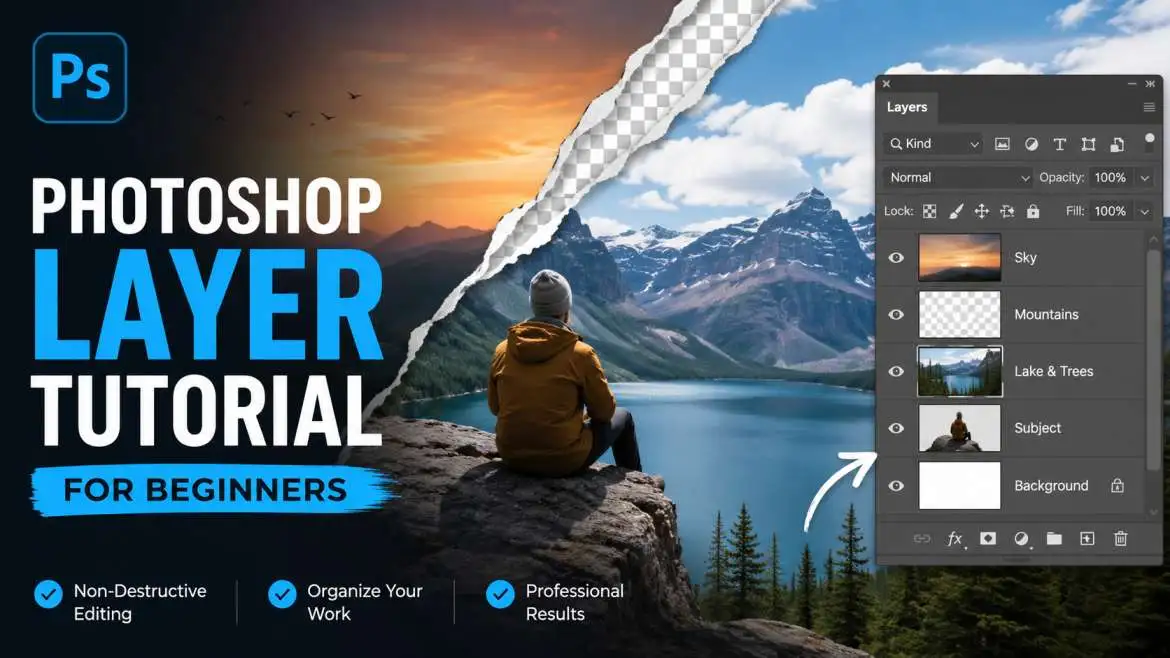
Welcome to the Ultimate Photoshop Layer Tutorial
I actually ruined a priceless family photo the first time I ever used Photoshop. I wanted to fix a tiny scratch, but I accidentally dragged a massive paint line right across my grandfather's face. Like a fool, I hit save and shut down the computer. Just like that, the original picture was gone forever.
That total disaster happened for one simple reason: I didn't know how to separate my work. Fast forward to today, and I actually train professional photographers and design students for a living. Every single semester, I tell my new students the exact same thing on day one. You will never master digital art until you understand the layers panel. Let me show you how to use this tool properly so you never have to feel the heartbreak of destroying a good photo.
You may also read :- How to Create and Edit a Layer Mask in Photoshop?
What Are Layers in Photoshop?
Imagine you have a stack of clear plastic sheets resting on your desk. You paint a green field on the bottom plastic sheet. You paint a brown house on the middle plastic sheet. You paint a bright sun on the top plastic sheet.
When you stand up and look straight down, you see a complete scene of a house in a field. If you decide you do not want the sun anymore, you do not throw away the whole drawing. You just slide out the top plastic sheet and wipe it clean. The house and the field stay perfectly safe underneath. That is exactly how digital imaging works. Layers let you separate parts of an art project so you can edit one item at a time.
Why You Must Use Stacking Tools for Graphic Design
Professional design work requires absolute flexibility. If you paste text directly onto a background photo, the pixels blend together forever. You cannot move the words to a new corner later. You cannot change the font size easily after saving.
Using individual sheets gives you total power over your digital canvas. You can lower the opacity of an item to make it see-through like water. You can change blending modes to mix colors between different sheets. Best of all, you keep your raw source files safe from accidental destruction.
How to See Layers in Photoshop and Fix Your Workspace
Many beginners get stuck because their control panels disappear from the screen. If your computer monitor looks empty, do not worry. You just need to tell the software to display the proper window.
Look at the top menu bar on your screen and click Window. Look down the list until you see Layers. Click that word, and a small checkmark will show up next to it.
The panel window will now pop open on the right side of your computer screen. This area shows you a vertical list of every single sheet inside your document. The sheet sitting at the very top of the list is the one that sits on top of your photo stack. Study the interface layout shown above. The list lets you see exactly how your visual elements stack from top to bottom.
Also read :- Essential Photoshop Shortcuts to Speed Up Your Workflow
The Essential Show Layers in Photoshop Shortcut
Speed is everything when you are working on a creative project. Moving your mouse to the top menu bar every few minutes slows down your workflow. You can open and hide this panel using a single button.
Find the F7 key on the very top row of your keyboard. This key acts like a simple light switch. Press it one time, and the panel appears on your screen. Press it a second time, and the panel disappears.
This keyboard trick functions exactly the same way whether you use a Windows computer or an Apple Mac computer. Learn this key on your first day to save hours of clicking later.
Understanding the Different Types of Layers in Photoshop
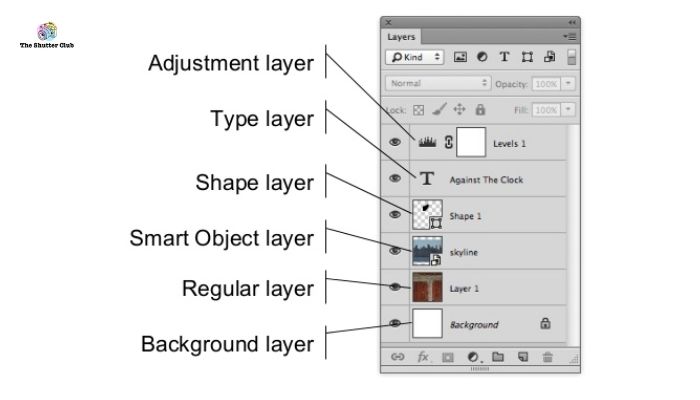
Not every sheet in your vertical stack behaves the same way. The software uses special kinds of sheets to handle different creative jobs. Learning these variations keeps your projects neat and tidy.
1. Pixel Layers
These are standard sheets that hold raw image data, camera photos, paintbrush strokes, or erased shapes. When you open a standard JPEG photo, it starts as a locked pixel sheet.
2. Text Layers
The moment you click the Type tool and type words onto your canvas, the software creates a text layer automatically. It holds your words so you can change spelling, fonts, and colors anytime.
3. Adjustment Layers
These sheets act like colored filters placed over a camera lens. They alter the colors, brightness, or contrast of the sheets underneath them without changing the real photo pixels.
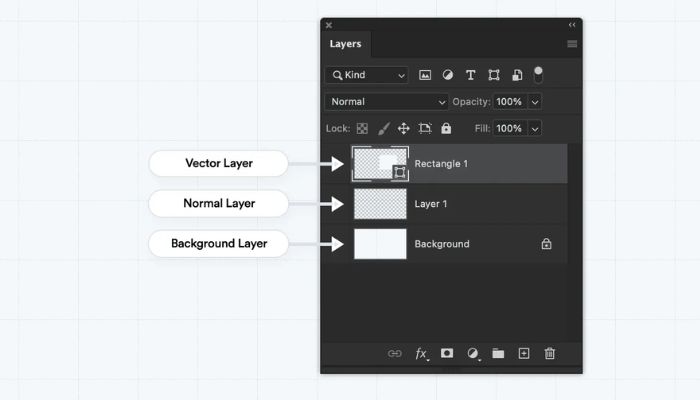
4. Vector Shape Layers
These sheets hold clean mathematical shapes like boxes, circles, or custom design lines. They stay perfectly sharp even if you stretch them to the size of a billboard.
Photoshop Layer Tutorial for Beginners: Build Your First Project
Let us walk through a quick practical exercise together to test your new skills. Open up your software and follow these exact instructions to see how the system operates.
1. Open a Fresh Canvas: Step.
Click File in the top corner then click New. Enter 1920 for the width and 1080 for the height in the pixel boxes and click Create. You will see a locked white sheet in your list.
2. Create a New Blank Sheet: Step.
Move your mouse to the bottom row of your panel and click the small square icon with a plus sign inside it. A new item called Layer 1 will show up right above your background.
3. Paint Your First Shape: Step.
Click the Brush tool from the left side toolbar. Select a bright red color. Draw a circle right in the middle of your white workspace canvas.
4. Stack a Second Element: Step.
Click that same plus sign icon at the bottom of the panel once more to build Layer 2. Pick a bright blue color this time and draw a square directly over your red circle.
How to Manage, Move, and Reorder Your Project Stack
Now look over at your panel window. You have three distinct sheets stacked on top of each other. You can control these objects separately using your mouse.
To slide the blue square away from the red circle, click on Layer 2 inside your panel list. Pick the Move Tool from the very top of your left hand toolbar. Click down on your canvas and drag your mouse around. The blue square moves freely while the red circle stays locked in place.
You can also change who sits on top. Click Layer 2 inside your panel list and hold your mouse button down. Drag the item downward until it sits underneath Layer 1, then let go. Now, the red circle appears on top of the blue square on your main screen.
"Keeping your panel organized is the secret to fast editing. Name your sheets immediately so you never lose track of your work." — Senior Designer Marcus Cole
Pro Tips for Advanced Control Over Your Artwork
When you feel comfortable with the basics, you can start using advanced settings to create unique visual styles. These options live at the top of your panel box.
- Change the Opacity: Locate the Opacity slider box in the top right section of the panel. Drop the number down from 100 percent to 40 percent to make your selected sheet look clear like glass.
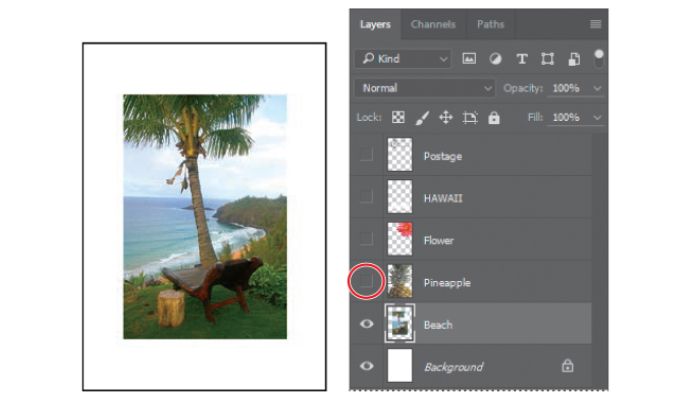
- Toggle the Eyeball Icon: Look at the tiny eye icon on the left edge of each item in your list. Click it once to hide that item from your screen. Click the empty box again to bring it back.
- Lock Your Progress: Click the small padlock symbol near the top of the panel window. This locks your selected sheet so you do not accidentally paint over a piece of art you already finished.
Common Stacking Mistakes and How to Solve Them Right Away
Every new designer bumps into the same few roadblocks. Use this quick reference chart to fix your layout issues instantly when you get stuck.
| What Is Happening | The Real Cause | The Fast Fix |
| Your brush will not draw | You are clicked on a locked background sheet | Click a new blank sheet in the panel list |
| The wrong item moves | You selected the wrong row in your panel window | Look at your list and click the exact item row |
| Separate items move together | Your sheets got linked together by accident | Click the tiny chain link icon to separate the items |
Photoshop Layers Troubleshooting FAQ
What happens if you delete the locked background layer?
The solid white background disappears completely. You will see a gray and white checkerboard grid on your screen instead. This is just how the software shows transparent space. It means there are no background pixels left, which is exactly what you need when exporting cutouts or transparent PNG graphic files.
How do you consolidate two layers together?
Select the layers you need to combine by holding Ctrl on Windows or Command on a Mac whereas clicking them. Right-click the highlighted lines and select Blend Layers. You ought to as it were do this when you are totally wrapped up altering those particular pieces, since isolating them a short time later is fantastically troublesome.
Why is a large layer stack making the computer run slow?
Photoshop uses up a massive amount of computer RAM to track pixels across multiple active sheets. When your system memory fills up, the software lags. To fix this, save your workspace progress immediately, look through your project panel, and merge completed elements together to free up system memory.