Taking great photos doesn’t have to be hard. You just need a few basic photography tips to get started. Whether you use a phone or a camera, learning small skills makes a big difference. This guide will walk you through photography basics tips for beginners in a simple, fun way. No confusing words. No fancy gear required. Just real help from someone who has taught hundreds of people how to take sharper, brighter, and more beautiful pictures.
Basic Photography Tips Every Beginner Should Know
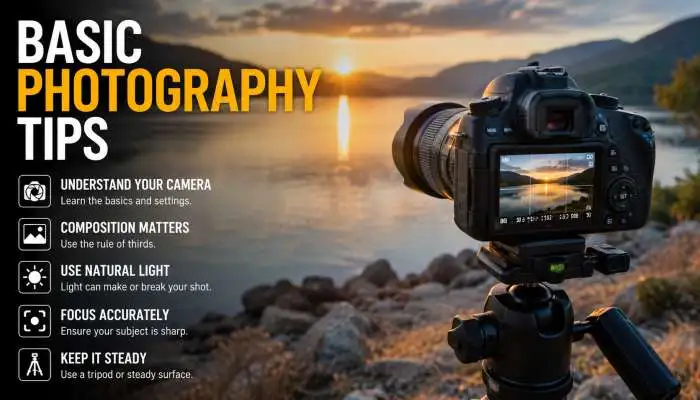
Start with These Simple Basic Photography Tips
You don’t need a degree in art. You just need to practice three things: light, stability, and focus. Basic photography tips always begin with light. Look for soft window light or shoot outside during early morning or late afternoon. That’s the "golden hour." Next, keep your camera or phone still. Use two hands or rest your elbows on a table. Finally, tap on your main subject to focus. These three basic photography tips will remove 80% of common photo problems.
Why Basic Photography Tips Help You Learn Faster?
Learning photography basics notes is like learning to cook. You start with simple recipes. Then you add spices later. When you follow basic photography tips, you build confidence quickly. You stop guessing. You start knowing what works. That’s why teachers and pros always tell beginners to master small steps first.
You may also read :- Learn Photoshop Step by Step: Full Tutorial with Pictures
Photography Basics Tips for Beginners – The First 3 Lessons
Lesson One – Hold Your Camera Like a Pro
Shaky hands cause most blurry photos. Try this simple fix. Tuck your elbows against your sides. Hold the camera right up to your face. Take a small breath out, then press the button. For a phone, use two hands. Tap the volume button to snap the picture. This little trick keeps your phone or camera very still.
Lesson Two – Find Good Light Every Time
Light is your best friend. Basic concepts of photography all start with light. If a room is dark, move closer to a window. If you are outside at noon, find shade. Harsh sunlight makes people squint and creates dark shadows. Soft light from clouds or windows gives you pretty, even photos. Remember this simple rule: more soft light = better photos.
Lesson Three – Fill the Frame
Many beginners leave too much empty space around their subject. One of the easiest photography basics composition rules is to get closer. Walk toward your pet, your child, or your flower. Fill most of the picture with what you love. This makes your photo feel more personal and powerful.
Photography Basics Notes – Keep This Cheat Sheet
Quick Photography Basics Notes for Daily Use
Write these photography basics notes on a sticky note or save them in your phone:
- Light direction – If light is behind your subject, your subject looks dark. Move so light falls on their face.
- Focus point – Tap the face or object you want sharp.
- Background check – Look behind your subject. Move a trash can or messy table out of the frame.
- Hold still—Count one second after you press the shutter before moving.
How to Use Photography Basics Notes to Improve Fast
Carry these photography basics notes with you when you go out. After you take ten photos, review them. Ask yourself: did I use soft light? Is my subject in focus? Did I hold steady? This self-check method works better than watching hours of YouTube. Action beats watching every time.
Basic Concepts of Photography Explained Simply
Exposure – The Heart of All Basic Concepts of Photography
Basic concepts of photography include exposure. Exposure just means how bright or dark your photo looks. Three things control exposure: shutter speed (how long the camera sees light), aperture (how wide the lens opens), and ISO (how sensitive the camera is to light). But as a beginner, don’t worry about all three. Just use your camera’s auto mode and learn to adjust brightness with the “exposure compensation” dial (+/-). Make it +1 for brighter photos and -1 for darker photos.
Focus – Another Key Basic Concept of Photography
Focus tells your camera what to make sharp. Basic concepts of photography always include focus because a blurry subject ruins any photo. On a phone, tap the screen where you want sharpness. On a camera, press the shutter halfway down. Wait for a beep or a green box. Then press fully.
White Balance – The Easy Basic Concept
White balance sounds fancy, but it simply means making whites look white. Indoors, lights can make your photo look orange. In shade, photos can look blue. Most cameras and phones have an auto white balance setting. That works fine for beginners. Later, you can try “cloudy” mode for warm sunset looks.
Photography Basics Composition – Simple Rules That Work

Rule of Thirds – The King of Photography Basics Composition
Photography basics composition starts with the rule of thirds. Imagine a tic-tac-toe grid on your screen. Place your subject on one of the four spots where the lines cross. For example, put a person’s eye on the top left cross. Put a flower on the bottom right cross. This makes your photo balanced and interesting. Most phones can show this grid in settings. Turn it on today.
Leading Lines – A Fun Photography Basics Composition Trick
Look for lines that point to your subject. Roads, fences, rivers, or even a row of trees work great. Photography basics composition uses leading lines to guide the viewer’s eye. Stand at the start of a sidewalk and aim your camera toward a friend at the end. The lines pull us into the photo. Simple and powerful.
Framing – Another Easy Photography Basics Composition Tool
Use a window, a door, or tree branches to create a “frame” around your subject. Photography basics composition loves this trick because it adds depth. It makes your photo feel like a story. For example, take a picture of a child through a doorway. Or shoot a sunset through a heart-shaped gap in leaves.
Learn Photography Basics by Doing These 5 Exercises
Exercise One – Learn Photography Basics with One Light Source
To learn photography basics, find one lamp in a dark room. Place an apple or a toy on a table. Turn off all other lights. Move the lamp around the apple. See how shadows change. Notice how the apple looks different when light comes from the side, front, or back. This five-minute lesson teaches you more than reading for an hour.
Exercise Two – Learn Photography Basics by Shooting the Same Object
Pick one coffee mug. Take 20 photos of it from different angles: high above, down low, close up, far away, with a window behind it, with a window beside it. This helps you learn photography basics without confusion. You see how angle and light change everything.
Exercise Three – Learn Photography Basics with Motion
Ask a friend to walk slowly toward you. Take photos as they come closer. Try to keep their face sharp. If it’s blurry, use a faster shutter speed (on a camera) or take photos in brighter light (on a phone). This real-world test helps you learn photography basics about freezing motion.
Exercise Four – Learn Photography Basics by Copying Pros
Find five photos you love on social media or in a magazine. Try to copy one each day. Do not post them. Just practice. Notice how the pro used light, composition, and focus. Copying is one of the fastest ways to learn photography basics because you train your eye.
Exercise Five – Learn Photography Basics by Reviewing Your Old Photos
Open your camera roll from one year ago. Pick three bad photos. Write down exactly why they are bad: dark? blurry? messy background? Now pick three good photos. Write down why they work. This honest review helps you learn photography basics from your own experience.
Common Beginner Mistakes and How to Fix Them

Mistake – Taking Photos from Eye Level Only
Almost all beginners stand straight and shoot at eye level. That gets boring fast. Fix this: kneel down, climb on a chair, or lie on the floor. A photo of a dog from above looks average. A photo of a dog from its own eye level looks special. This small change is one of the most powerful basic photography tips.
Mistake – Ignoring the Background
You focus so hard on your smiling child that you don’t see the trash can behind them. Fix this: before you press the shutter, scan the background. Move two steps left or right. Ask your subject to step forward. A clean background makes your subject pop.
Mistake – Using Digital Zoom
Digital zoom on phones just crops the photo and makes it blurry. Fix this: walk closer. If you cannot walk closer, take the photo at normal zoom and crop later. Or buy a clip-on lens for your phone. Never use digital zoom if you want sharp photos.
Expert Quote and Real-Life Opinion
“For 15 years, I have taught thousands of beginners. The number one problem is not gear. It is shaky hands and bad light. Master those two basic photography tips, and you jump past most casual shooters.”
— Sarah Jenkins, professional photographer and workshop instructor
My opinion: I started with a broken phone camera. I felt embarrassed. But I practiced photography basics notes every single day. Within three months, my friends asked me to take their photos. Within one year, I printed my first picture. You can do this too. Do not wait for a better camera. Start now with what you have.
Final Summary
| Basic Photography Tip | Why It Works | Try This Today |
|---|---|---|
| Hold camera steady | Removes blur | Tuck elbows, exhale, then shoot |
| Use soft light | Makes colors look true | Shoot by a window or in shade |
| Fill the frame | Removes empty space | Walk three steps closer |
| Rule of thirds | Balances the photo | Turn on grid in phone settings |
| Clean background | Keeps focus on subject | Scan behind before you tap |
You now have real basic photography tips that work. Bookmark this page. Print the cheat sheet. Take one photo right now using the rule of thirds. Then take another photo using soft window light. Compare them. You will see the difference immediately. Keep practicing. Keep having fun. And remember: every pro was once a beginner who refused to give up.
Frequently Asked Questions
Q1: I just got my first camera. What is the very first thing I should learn?
Hold the thing still. I mean it. Put both hands on it. Pull your elbows into your ribs. If there is a wall or a tree nearby, lean on it. Most beginners ruin shots by moving. Bad light you can sometimes fix. A blurry face? You cannot fix that. So practice holding still first. Everything else comes after.
Q2: Be real with me. How much practice are we talking about?
Okay, real talk. You can learn the rules in a weekend. But feeling like you know what you are doing? That takes two to four weeks of daily practice. Not hours a day. Just ten minutes. Take ten photos every morning or every night. Do that for 30 days. Around day 20, something clicks. You stop guessing and start seeing. That is when it gets fun.
Q3: My phone is two years old. Is that good enough or do I need a real camera?
Your phone is fine. Really. Stop worrying about gear. I have seen amazing photos taken on phones that cost less than a dinner out. All the tips here work on phones. Good photos come from your eyes and your hands. Not from your wallet. Spend your money on experiences to photograph, not on fancy equipment you do not need yet.
Q4: I do not have money for classes. Where can I learn for free?
YouTube. But do not get lost there. Two channels I actually like are "Photography for Beginners" and "The Art of Photography." Also open your phone's camera app and poke around in settings. Most phones have little help guides hiding in there. But here is the truth: the best free teacher is you. Go outside. Take bad photos. Figure out why they are bad. Take them again. That process teaches more than any video.
Q5: How do I know if a photo I took is any good? I cannot tell anymore.
I know that feeling. You look at it too long and go blind. Here is what I do. Put the phone down for an hour. Come back. Then ask a friend who will tell you the truth. Not a nice friend. An honest one. Then ask yourself these five things out loud:
- Is the person or thing I wanted to capture actually sharp?
- Is the bright part of the photo too bright or just right?
- Is there a trash can or a coat rack growing out of someone's head?
- Does this photo make me feel something small? Even a little?
- Would I hang this on my fridge or send it to my mom?
If you say yes to three of those, keep it. If you say yes to four or five, print it.