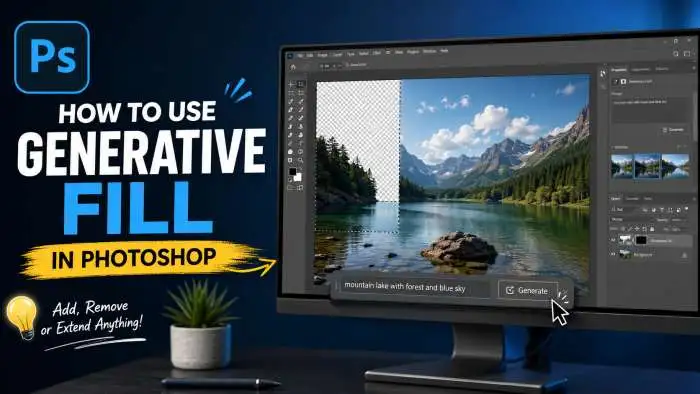
Generative Fill in Photoshop is an AI tool that lets you add, remove, or replace image content using simple text prompts. To use it, select an area in your image with any selection tool, click the Generative Fill button in the Contextual Task Bar, type a description of what you want (or leave it blank to remove objects), and click Generate. Photoshop creates three variations on a new layer, allowing for non-destructive editing. This guide walks through every step, covers where to find the tool, explains how to activate it, and explores free alternatives—all in plain, easy-to-understand language.
What Exactly is Generative Fill?
Before we dive into the steps, let’s talk about what this tool actually is. Generative Fill is an AI-powered feature inside Adobe Photoshop . It lives on Adobe's servers, so you need an internet connection to use it . When you select an area and type a prompt, Photoshop sends that information to the cloud. The AI processes it and sends back the new image. This all happens in just a few seconds.
The "Generative" part means it creates something new. It does not just copy and paste pixels from another part of your photo. It actually invents new content based on your instructions. This is perfect for brainstorming new ideas or making big changes quickly .
You may also read :- Photoshop Tutorial for Beginners: Learn Graphic Design Basics
How It Saves You Time
This tool reduces the amount of editing time greatly! You'll save 10-15 minutes worth of manual cloning/blending effort and achieve a great result in 30 seconds. One of the most thrilling features of Photoshop in years. The feeling is as if you are having a smart assistant who knows what you want to do.
Where is the Generative Fill Tool in Photoshop?
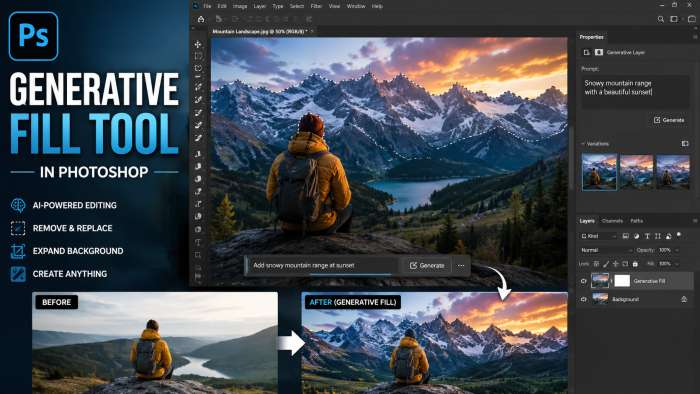
One of the frequently asked questions I receive is, "Where is the Generative Fill tool in Photoshop? There's a simple answer. It's not in the top menu. Rather, it resides in a floating bar close to you.
When you make a selection using any tool, a Contextual Task Bar appears just below your selection . This bar changes depending on what you are doing. It shows you options that are relevant to your current task. The Generative Fill button is right there on this bar.
If you do not see the Contextual Task Bar, you can turn it on. Go to the Window menu at the top of your screen. Look for Contextual Task Bar and click it to make sure it has a checkmark next to it . Once it is on, it will pop up every time you select something.
How to Activate Generative Fill in Photoshop?
Knowing how to activate Generative Fill is the first step to using it. Here is the quick version of How to activate Generative Fill in Photoshop:
- Make sure your file is an RGB/8-bit file. Most JPEGs and PNGs work fine. If you are working in CMYK or a 16-bit file, the option will be greyed out .
- Select a raster layer. This means a normal pixel layer. If your layer is a Smart Object or a text layer, you need to rasterize it first .
- Ensure you are connected to the internet. The generation happens in the cloud, so you need a stable connection .
- Sign in to your Adobe account. You need a valid Adobe ID to use the feature.
- Select an area of your image. You must have an active selection. If you do not select anything, the button will not show up or it will be greyed out .
- Look for the Contextual Task Bar. The Generative Fill button is there.
If you follow these steps and the tool is still greyed out, check your file type. Also, make sure your GPU drivers are up to date . Sometimes, an out-of-date driver can cause the tool to freeze or crash.
How to Use Generative Fill in Photoshop: A Step-by-Step Guide?
So let's take a look at How to Use Generative Fill in Photoshop and do a step by step process. But now to the show. Let's look at the Step-by-step Guide: How to use generative fill in photoshop. We will demo three common tasks: remove, add and expand canvas.
Step-by-Step Guide for Removing Objects
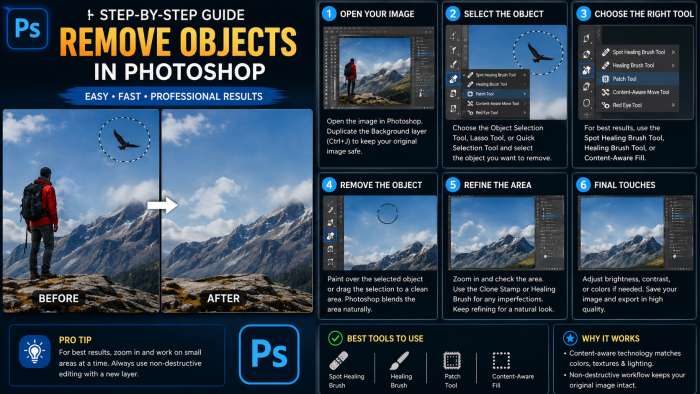
This is the most common use case. You want to get rid of something in your photo.
Step 1: Open Your Image
Open the photo you want to edit in Photoshop.
Step 2: Select the Object
Use any selection tool to highlight the object you want to remove. The Lasso Tool works great for quick selections . If the object is complicated, try the Object Selection Tool. You can find it in the toolbar. It will automatically detect and select the object for you.
Step 3: Activate Generative Fill
Once you have your selection, look for the Contextual Task Bar. Click the Generative Fill button .
Step 4: Leave the Prompt Blank
This is a neat trick. If you want to remove something, leave the text prompt blank . Do not type anything. Just click Generate.
Step 5: Choose Your Variation
Photoshop will send the image to the cloud. In a few seconds, it will give you three variations . These are three different ways the AI filled the space. Click through them to see which one looks the best. Pick the one you like.
Expert Opinion: "Removing objects is where this tool truly shines. Instead of spending minutes trying to cover up a shadow or an unwanted person, you just select and click. It saves so much time," says a professional retoucher.
Step-by-Step Guide for Adding Objects
What if you want to add a new element to your image? Maybe a bird in the sky or a flower in a field?
Step 1: Select the Area
Pick the spot where you want the new object to go. Use the Rectangular Marquee Tool or the Lasso Tool to draw a selection.
Step 2: Click Generative Fill
Find the Contextual Task Bar and click the Generative Fill button.
Step 3: Write a Clear Prompt
This is where you get creative. Type a description of what you want to appear . Be specific. Instead of typing "flower," try "yellow sunflower with green leaves." Instead of "sky," try "blue sky with white fluffy clouds." Specificity gives you better results .
Step 4: Click Generate
Watch the magic happen. The AI will generate a new object in that spot.
Step 5: Pick the Best Result
Again, you will see three variations. Choose the one that looks most natural.
Step-by-Step Guide for Expanding the Canvas (Generative Expand)
Let's say you have a square photo, but you need a rectangle for a website banner. You can use Generative Fill to expand the canvas.
Step 1: Use the Crop Tool
Select the Crop Tool from the toolbar (or press the "C" key). Drag the handles of the crop box outward to make the canvas bigger than the original image . This will create empty space on the sides or top.
Step 2: Select the Empty Space
Use the Rectangular Marquee Tool to select the newly added empty area. Make sure your selection slightly overlaps the edge of the original image. This helps the AI blend the new content smoothly .
Step 3: Click Generative Fill
In the Contextual Task Bar, click Generative Fill.
Step 4: Leave Blank or Type a Prompt
If you want the background to extend naturally, leave the prompt blank . If you want something specific there, type it.
Step 5: Generate and Choose
Click Generate. Photoshop will fill the blank area with content that matches the lighting and perspective of your original image. Pick the variation you like best.
Also read :- Adobe Photoshop Tutorial for Beginners: Start Editing Like a Pro
How to Use Generative Fill for Free?
Adobe subscriptions can be expensive. So, the question "How to use Generative Fill for free? " comes up a lot.
The Official Adobe Path
Adobe does offer a free trial for Photoshop. You can access the tool during this trial period. However, you have a limited number of "Generative Credits" . Each generation uses one credit. Once you run out of credits, you need to wait for a renewal or buy a subscription .
The DIY Alternative
You are not completely locked into Adobe if you do not want to pay. There is a free, open-source image editor called GIMP. You can get a free plugin for GIMP called Stable Boy . This plugin connects GIMP to an AI model called Stable Diffusion.
This is a more technical setup. You have to run the AI on your own computer or through a service like Google Colab. It takes time to set up. But if you are on a budget and have a bit of patience, it is a powerful free alternative .
Tips for Better Generative Fill Results
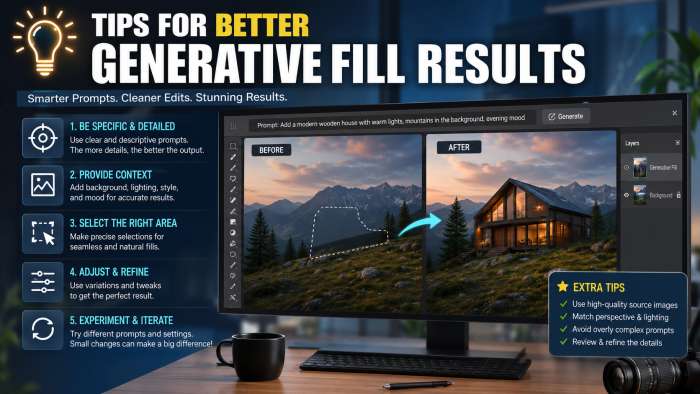
Using this tool is easy. Using it well takes a little practice. Here are some tips I have learned from experience to help you get the best possible results.
Be Specific with Your Prompts
This is the golden rule. The AI is smart, but it is not a mind reader. If you type "dog," you might get a golden retriever, a poodle, or a cartoon drawing. If you type "a realistic brown Labrador retriever sitting on a green lawn," you will get exactly what you want .
Use the "Generate" Button Again
Do not like the first three variations? That is okay. Just click Generate again. Photoshop will create three entirely new variations for you . You can do this as many times as you want.
Refine Small Flaws with the Remove Tool
Sometimes, Generative Fill creates a great image, but it might have a small glitch. Maybe there is an extra shadow or a weird smudge. You can fix this quickly with the Remove Tool in Photoshop. Create a new layer on top of the Generative Layer. Then, use the Remove Tool to brush over the small flaw. The tool will sample the surrounding pixels and remove the mistake .
Conclusion
How to use generative fill in photoshop is a skill that will transform the way you edit photos. This feature takes the hard work out of complex edits. You can remove distractions in seconds. You can add new elements to tell a better story. You can expand your canvas to fit any format.
This tool is ideal for professional graphic designers or those who would like to spruce up family photos. It provides you access to AI that you can use at your fingertips. Just remember to be specific with your prompts, try the variations and be impatient to create a few times until you get the look you want. So, go to Photoshop, select something and go to create! There's one thing you can do: the only limit is your imagination.
Frequently Asked Questions
1. Do I need an internet connection to use Generative Fill?
Yes. Generative Fill processes your image on Adobe’s cloud servers. You must be connected to the internet for the tool to work .
2. Is Generative Fill safe for commercial use?
Yes, in most cases. Adobe trained the Firefly AI model on licensed content, like Adobe Stock, and public domain content. However, always check the licensing terms for your specific project .
3. Is Generative Fill free to use?
You get a limited number of free "Generative Credits" with a Photoshop subscription or a free trial. After those credits are used, you need to wait for them to renew or purchase a plan with more credits .
4. Where is the Generative Fill tool?
The tool appears in the Contextual Task Bar. You must make a selection in your image for the button to show up .
5. Can I use Generative Fill on a Smart Object?
No. You must rasterize your layer first. Generative Fill works on standard pixel layers .