Don’t even look at your camera yet. Just talk to the person first. That’s the whole trick. A good portrait needs to show who someone really is, not just a fake smile they put on for a second. You don't need fancy, expensive gear to do this. It's way more about how you find the light, set up the shot, and get people to stop feeling awkward.
Look, if you’re new to this or just doing it for fun, these simple tips change everything. You'll figure out how to use normal daylight, pick the right lens, and get anyone to relax in front of you. Try these out and you'll finally start making pictures you actually want to show off.
What is portrait photography?
Portrait photography is all about capturing a person's identity, personality, or story in a picture . It is more than just taking a snapshot. Portraits are just about showing who someone actually is. Honestly, who cares if you are using big studio setups or just grabbing a quick, messy shot on a random sidewalk?
The only goal is making that person look good. You just grab whatever light is around, tell them how to stand, and find a decent angle to capture their vibe. The absolute best photos tell a quick story and make you feel like you really know the person.
Portrait photography is a way to celebrate the people in our lives. It freezes a moment in time and lets us see the real person behind the smile.
You may also read :- How to Use Natural Light in Photography (Pro Tips & Techniques)
Essential Portrait Photography Tips for Beginners
These core portrait photography tips will help you get started on the right foot. They cover the most important things to think about before you press the shutter button.
Connect With Your Subject First
The number one secret to a great portrait is making your subject feel comfortable. Talk to them before you start shooting. Ask about their day or what they hope to get from the photos . When people feel at ease, their true personality shows. This leads to more authentic and captivating portraits .
A genuine smile and relaxed body language come from feeling safe. Your job is to create a friendly environment. Even if you only have a few minutes, introduce yourself and be open and friendly . This helps your subject relax in front of the camera.
Pick the Right Lens and Focal Length
Your lens choice changes how a person looks in a photo. For classic portraits, a short telephoto lens in the 85mm to 135mm range is best . These lenses create a flattering look. They gently compress facial features and make the background look blurry . They also let you stand a comfortable distance from your subject.
Avoid using wide-angle lenses for portraits. They can distort the face and make features look larger. A 50mm lens is also a good choice for more natural, everyday portraits .
Use Eye-AF for Sharp Focus
The eyes are the most important part of any portrait. They are the "windows to the soul." If the eyes are not sharp, the whole image can feel off. Use your camera's Eye-AF feature if it has one . This tool locks focus right on the eye. This ensures your subject's eyes are always tack sharp and full of life .
A sharp eye draws the viewer into the image. It creates a deep connection with the person looking at the photo. Always make sure your focus point is on the eye nearest to the camera.
Master Lighting for Portrait Photography
Lighting is the backbone of photography. It sets the mood and shapes your subject's features. Here are some simple portrait photography tips for working with light.
The Magic of Natural Light
Natural light is often the most beautiful and flattering light for portraits . Soft, natural light can smooth skin tones and reduce harsh shadows. The best times to shoot are during the "golden hour" – the hour after sunrise and the hour before sunset . The light is warm and soft.
You can also find great light in open shade, like under a tree or an awning. This light is even and gentle. Position your subject near a large window for beautiful, soft light indoors .
Direct Your Light for Drama
The direction of your light changes the whole feel of a portrait. Front lighting, where the light is behind you, is simple and softens skin. But it can also make a face look flat .
Side lighting is much more dramatic. It lights only half the face, leaving the other half in shadow . This creates depth and can make a portrait look more powerful and mysterious. You can get this effect by placing your subject next to a window or by having the sun hit them from the side.
Try Window Light
Window light is a fantastic and free tool for portrait photography . It is a large, soft light source that creates a beautiful, flattering glow. Position your subject at a 45-degree angle to the window . This will create a nice balance of light and shadow on their face.
If the light is too bright, you can use a thin white curtain to soften it even more. Window light is perfect for indoor portrait sessions. It's simple to use and gives professional-looking results.
Composition Techniques for Better Portraits
Composition is how you arrange things in your frame. Good composition helps guide the viewer's eye to your subject.
Follow the Rule of Thirds
The rule of thirds is a basic but powerful rule. Imagine a tic-tac-toe grid on your screen. Instead of placing your subject in the center, put them along one of the lines or at one of the four points where the lines cross . This makes your photo more dynamic and interesting. For a portrait, try placing your subject's eyes on the top horizontal line. This creates a balanced and pleasing look .
Get Creative With Angles
Most portraits are taken at eye level. Try changing your angle for a fresh look. Shoot from above for a unique perspective . Get down low and shoot up at your subject. This can make them look powerful and strong. Experimenting with different angles adds variety and creativity to your portrait photography.
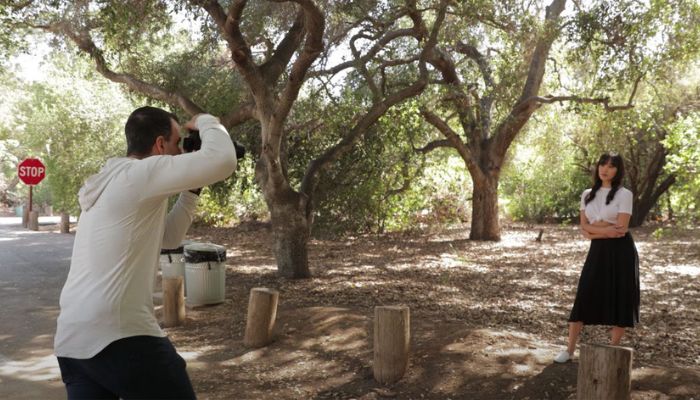
Choose a Simple Background
A clean, uncluttered background helps your subject stand out . Look for solid walls, open skies, or simple textures . A busy background with distracting objects can pull attention away from the person. Also, watch out for objects "growing" out of your subject's head, like a tree branch or lamp post . A simple background keeps the focus on your subject's face and expression.
Posing and Directing Your Subject
Many people feel shy or awkward in front of a camera. Your job is to guide them and help them look and feel their best.
Give Simple and Clear Directions
Instead of saying "turn your head," try giving an emotional prompt like "think about something that makes you smile." This often leads to a more natural and genuine expression . Encourage natural movements rather than stiff, rigid poses . Ask them to lean against a wall, walk, or look away from the camera.
Use Simple Posing Tricks
Small adjustments can make a big difference. Ask your subject to angle their body slightly away from the camera while keeping their face towards you . This creates a more slimming and natural look. Have them shift their chin slightly forward and down. This helps define the jawline . For a natural look, try to make sure the camera is at or slightly above your subject's eye level .
Capture Candid Moments
Some of the best portraits are not posed at all. Candid portraits capture people in the moment, doing what they naturally do. These photos feel authentic and full of life . You can often capture great candid shots when your subject is laughing or talking. Be ready to take the photo when they are not expecting it. These natural expressions often tell the best stories.
Advanced Portrait Photography Tips
Once you have the basics down, you can try more creative things. These tips will help your portrait photography stand out.
Experiment With Creative Lighting
You can move beyond natural light and try artificial lighting. Split lighting is a dramatic technique where you place the light 90 degrees to the side. This lights half the face and leaves the other half in shadow . It creates a strong, film-noir feel.
Rim lighting is another great technique. Place a light behind your subject. This creates a bright outline around them that separates them from the background and adds depth . This is a very effective portrait photography technique.
Learn Advanced Composition
Try breaking the rules for creative portraits. Place your subject right in the center of the frame for a powerful, symmetrical look . Use negative space – the empty area around your subject. This can create feelings of isolation or serenity . You can also use leading lines in your background to guide the viewer's eye right to your subject .
Use Intentional Camera Settings
Don't be afraid to change your camera settings for creative results. Use a very wide aperture (like f/1.4 or f/2.8) for a shallow depth of field. This will blur the background and make your subject pop . Play with slower shutter speeds to create motion blur for a sense of energy . These settings give you more control over the final look of your portrait.
Portrait Photography Tips Summary
Here is a quick summary of the best portrait photography tips:
| Tip Category | Key Advice |
|---|---|
| Connection | Talk to your subject to make them feel comfortable . |
| Focus | Use Eye-AF to keep the eyes tack sharp . |
| Lighting | Use soft, natural light from a window or during the golden hour . |
| Composition | Use the rule of thirds and choose a simple background . |
| Posing | Give simple directions and try for candid moments . |
| Lens | Use an 85mm to 135mm lens for flattering results . |
Frequently Asked Questions
1. What camera settings?
Drop your aperture to f/1.8 or f/2.8. That’s the secret to the blurry background look. Keep the ISO low so you don't get grainy noise. Cranking the shutter speed up stops any hand shake from ruining things. Oh, and always aim the focus point right at their eye. Done.
2. How to fix the awkwardness?
Stop acting like a photographer and just chat. Show them the back of the screen when you get a good shot so they relax. Give them something to do instead of just standing there. Tell them to mess with their hair, look at the ground, or laugh. Just distract them.
3. Best first lens?
Buy a 50mm. It’s cheap, tiny, and basically everyone starts with one. If you want to spend more later, get an 85mm. It makes people look way better.
4. What light is best?
Anything soft. Stand in the shade, use a big window, or shoot right before sunset. Avoid midday sun at all costs unless you want heavy shadows and everyone squinting.
5. Will a phone work?
Yeah, easy. Flip it to Portrait Mode for the fake blur. Don't get right in their face though—back up and tap the 2x or 3x zoom so their face shape looks normal. Find a bright window and you're good.