If you want to take beautiful photos without buying expensive studio lights, you just need to look out the window. Natural light photography tips and tricks are all about learning to use the sunlight that is already there. I’ve spent years behind the camera, and I can tell you that the sun is the best and cheapest tool a photographer can have.
In this guide, I will walk you through everything I know about using sunshine, shade, and even cloudy skies to make your pictures pop. Let’s get started on making your photos look amazing with light that is completely free!
Why Natural Light Is Best for Photography?
I can recount how I attempted to install a studio light in my living room. It was perplexing, bulky and the photographs were artificial. It was then I packed it all up and opened the curtains. The difference was magic. Natural light photography is real since it is real. It is the light that we have in our daily lives and it aids in capturing the moments as they occurred.
It is not only easier to use the sun but it is more flattering. It has the ability to lighten the skin, bring depth to a scene, and narrate a story without the help of some fancy gadgets. The sun can be your little secret whether you are capturing a shot of your dog, your lunch or your best friend. It is only that you know a few little tricks to manipulate it.
Understanding the Two Best Types of Natural Light
Prior to my serious interest in taking photography, I believed that the only good days to take pictures were sunny days. I was so wrong! The first major discovery I made was the distinction between soft and hard light. moment.
You may also read :- Digital Camera Tips and Technology for Better Photography
Soft Light: The Secret to Flattering Photos
The soft light is all the dreams of a portrait photographer. It is soft and covers your subject without creating harsh shadows. This type of light is mostly encountered during cloudy days or during the golden hour. The clouds are like a huge blanket in the sky which disperses the sun rays evenly.
When I am in a position to take photos of people I prefer to use soft light as it leaves all the skin smooth and makes everybody look good. And you do not need to worry about people straining their eyes.
Hard Light: Creating Drama and Contrast
Hard light is the opposite. It is the sun in the daytime, in the middle of the day. Although it might not be easy, I have learnt to enjoy it in developing dramatic photos. Hard light produces dark and deep shadows and bright highlights.
It works best to give some texture to a picture of a brick wall or to produce some nice shadow effects on the floor. When you need a photo that looks bold and edgy, you should not retreat the camera at noon you should take the blazing sun.
How I Use Different Types of Natural Light Every Day
The sun travels over the sky in a day and the light varies according to the sun. This is the way that I structure my day around the sun to capture the ideal shot.
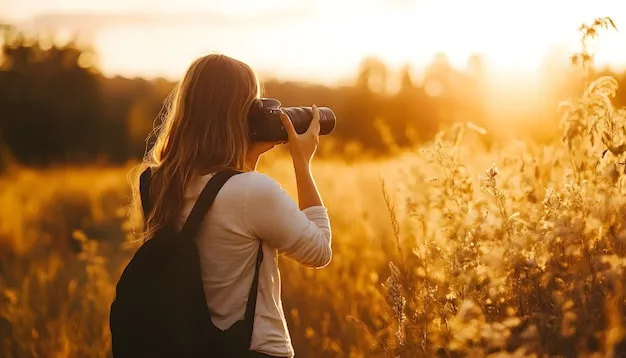
My Golden Hour Rituals for Warm Glows
There should be a single rule in my photography life, which is to shoot in golden hour. This occurs approximately an hour after the rise of the sun and an hour before the setting of the sun. The sky is overcast and the light is soft and it enters in beautiful and warm orange or pink color.
The time I take my camera is normally in the morning or just before dinner. The light is long and soft at this period. I have a tendency to place my subject with the sun behind him in order to achieve a cool back light effect, as this gives my subject a shinny halo around his hair.
How I Handle Harsh Midday Sun
I could not see the point of shooting at midday when the sun was right over the head and everybody looked like they had black raccoon eyes. Now, I know how to handle it. I outwit the sun not fighting it. My best-known eavesdropping method is to go into a shadowy place, such as the shade of a large tree or around a building.
This makes that glare of a sun so pleasant, smooth, level. When I cannot find some shade, I use the sun as a back light and allow my subject to shield against it and make them a cool silhouette.
Shooting on Cloudy Days: Why I Love Overcast Skies
Another secret weapon is not to hide your camera on the grounds that it is cloudy. The clouds act as the natural diffuser of nature, and the light is made friendly to an extent that shadows are virtually eliminated. I even wait to have slightly cloudy days when I desire to have a portrait shoot outside. The colors are balanced and you need not be concerned with the glare of the light ruining your exposure. It is as though there is a huge, cushy light-box in the sky.
Simple Lighting Setups I Use with Just the Sun
There is no studio that you need to control light. My feet and the face of my subject make me create various looks by simply turning around. The following are the three common ways I have to place my subjects in relation to the sun.
Front Lighting: Even and Bright
Front lighting occurs when the sun is right in front of your object. I do so when I desire to ensure that every detail is in the light and the colors are bright. It works well when you want to do a group photo and you do not want the face of any one in the shadow. Only take care--sometimes it is a little as though a face has been rubbed smooth, and there is no line of shadow to indicate form.
Side Lighting: My Favorite for Depth
This is likely to be my best technique. In the cases where the light is coming on the sides, the light casts shadows over the face or object. This immediately brings in the 3D and makes your picture look three-dimensional. It works best on demonstrating texture, such as the wrinkles of a jacket made of leather or the details of a leaf. I will usually make my subject turn his face till one of the sides is in the light and the other is in the shade.
My Go-To Camera Settings for Natural Light
At the beginning, I had problems with the camera buttons. However, when it comes to the natural light, it is just necessary to concentrate on a few items to be correct. It is not a complex of costly equipment, but understanding several numbers.
Adjusting ISO and Aperture Like a Pro
You have the ISO controlling the sensitivity of your camera. A bright sunny day makes my ISO extremely low say 100. The ISO is gradually increased when the sun is setting or I relocate to the house just in time to make the camera see even in the dark.
Aperture (or f-stop) is the amount of light passing through the lens. In case I need a fuzzy background behind an individual, I will select a low number such as f/2.8. When I want everything in focus, all the way to the front with the flower and the mountains at the far end, I then take a high number such as f/11.
Why I Always Shoot in RAW
This was a game-changer for me. RAW memory is equivalent to saving a digital negative of your image. It has much more information than a JPEG. When I accidentally adjust the brightness slightly off, or when the white balance (the colour of the light) is either too blue or too orange, it is very easy to adjust on my computer later without destroying the picture. It provides me with a safety cushion in instances where I have quick changing light.
Essential Gear I Use (That Isn’t a Camera)
You do not need much stuff, and two little tools can make you conquer the sun. These are the things that I carry in my camera bag.
Reflectors: Bouncing Light into Shadows
A reflector is simply a cloth that reflects the sunlight onto your object. When I am taking a picture with the sun at the back of my subject, their face may become dark. I take a reflector and reflect some light back on their nose and eyes.
- White reflector: Provides light natural fill.
- Silver reflector: Produces a brighter, more aggressive light.
- Gold reflector: Gives the lighting a warm, sunny effect (perfect in golden hour).
Diffusers: Softening Harsh Sunlight
A diffuser is a thin section of white fabric that is tauten over a structure. When I am unable to find shelter to shoot in the sun and it is scorching, I would position the diffuser between the sun and my target. It performs the same service that a cloud does, it makes that hateful light pretty light in a moment.
My Best Indoor Natural Light Photography Advice
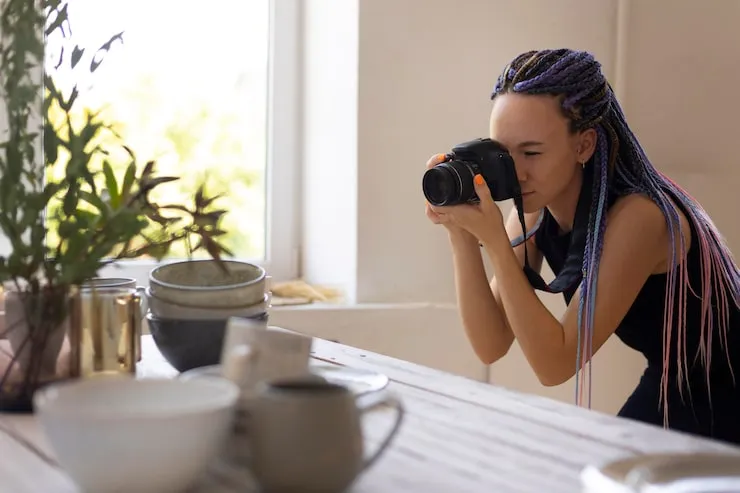
There is no need to go out and follow the sun. There is plenty of light in my house in case you know where to find it. Window light is a free studio.
I prefer to put up right beside a large window. The bigger the window the softer the light is. I tend to switch off all the interior lights in order to make the room darker enough to make the window light the star. I put my subject near by the window and experiment with angles. When the light is excessive on one side of the face I have placed a sheet of white cardboard in a place where it is dark to reflect some light back in.
Common Mistakes I Made (And How You Can Avoid Them)
I have already done thousands of unsuccessful shots on your behalf. These were the three biggest mistakes I made with natural light so that you can avoid these.
Mistake 1: Ignoring the Light Direction
In the beginning, I simply used to point-and-shoot what appeared good. I had not seen the location of the sun. The first thing that I do when approaching a scene is to look at the ground. Where are the shadows? Where is the sun coming from? The first step towards a good photo is knowing the direction of light.
When the source of the light is behind me (front light) I am aware that my photo will be bright but perhaps flat. When it comes on the side I know that there will be texture.
Mistake 2: Forgetting About White Balance
I would question myself on why my photos indoors were as yellow and my photos outside are as blue. That’s white balance. Various light possesses varying hues. Your camera has an option of fixing this with settings such as Cloudy, Shade or the Sunny. These I either manually set, or because I shoot in RAW, I correct the colour upon my computer later and ensure it is perfect.
Conclusion
The sun has taught me to use and now it has transformed my photography. It is free, it is beautiful and it is everywhere. I want to hope these natural light photography tips and tricks make you have a different point of view on the world. Take your camera, go out and simply stare at the light.
It is important to notice how it is in the morning and in the afternoon. Shadow and of light play. You will find that the sun is actually the best companion a photographer could ever have, the more you practise the more you will know this. Go out there and now make some magic with light!
Frequently Asked Questions
1. What is the most suitable time during the day to take photographs outdoors?
In my case, the golden hour is the best time and it is the first hour after the sunrise and the last hour before the sunset. The light is flattering, soft and warm.
2. Why do my pictures look too dark when I take them by the window inside the house?
Attempt to use a reflector or a plain piece of white foam board. Put it against the window, quite out of the frame, to reflect light upon the dark side of your object.
3. Am I able to do good portraits on a cloudy day?
Absolutely! A gray day gives you scattered light which is like a big soft box. It eliminates harsh shadows and it is also among the most flattering lights used in the portrait photography.
4. Why is my subject’s face in shadow when the sun is behind them?
That’s called backlighting. To fix it, you can either use a reflector to bounce light onto their face, use your camera flash to fill in the shadows, or move your subject so the sun hits them from the front or side .
5. Do I need an expensive camera to use natural light?
Not at all! Natural light works with any camera, even your phone. Understanding where to position your subject and learning to see good light is more important than an expensive lens.