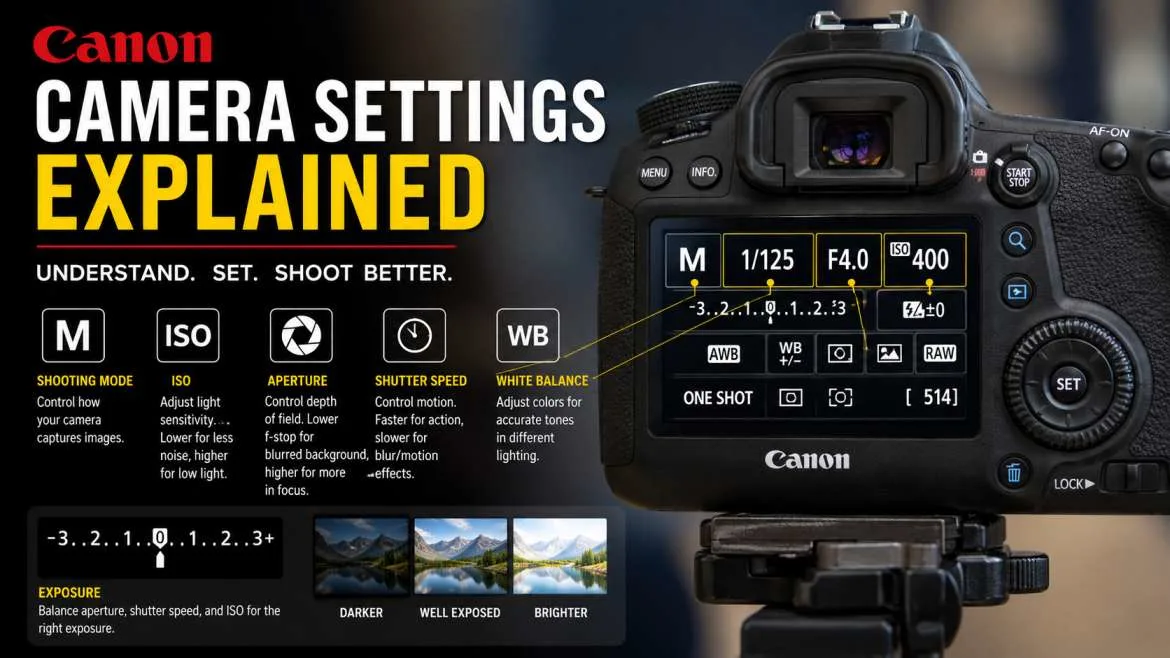
The key to getting the best Master Canon camera settings is to connect your “big three” camera settings (aperture, shutter speed, and ISO) to “big three” dial settings (Aperture Priority – Av, Shutter Priority – Tv, and ISO). New shooters can have a head start in photo quality by switching over to RAW format for ultimate control in post-processing, using 'Evaluative Metering' to make their photos as balanced as they want, and using 'Single-Point Autofocus' to tell the camera exactly where to focus.
A wide open lens at f/1.8 or f/2.8 will make a messy background smooth and blurry when a wide-angle lens is used, and a fast shutter speed such as 1/200s will prevent the handshake from affecting a successful photograph if using a fast shutter speed.
Mastering the Basics: Canon Camera Settings Explained
Ditching your phone to shoot on a real camera setup opens up a ton of fun ways to make art. Still, staring at those scary dials, deep menu screens, and tiny buttons can make your brain freeze at first. I have spent more than ten years shooting with all kinds of gear, from tiny cheap plastic starter bodies to the newest pro mirrorless setups. I will tell you the honest truth right now: building fast muscle memory around a few simple habits works way better than trying to memorize a massive guidebook all at once.
You may also read :- Best Camera Settings for Photography: Get Sharp Images
The Exposure Triangle Breakdown
Understanding canon camera settings requires grasping how aperture, shutter speed and ISO work in perfect harmony. Imagine that they are three legs of a wooden stool. If you pull hard on one leg, you need to twist the other two, otherwise it will just collapse on the ground.
- Aperture (f-stop): It's simply the hole in your lens. A low number such as f/2.8 allows a lot of light to enter and provides that ‘blurred' background. These big numbers such as f/11 will make the hole as small as possible to preserve that sharpness of a rock at your feet, to the hills miles away.
- The time that your camera door stays open to capture light's impact on the sensor is called Shutter Speed. A soccer ball is frozen in mid-air at fast speeds such as 1/1000s. The slow speed (such as 1/2s) creates a white ribbon effect instead of splashing stream.
Core Setup: Canon Camera Settings for Beginners
When you pull a brand new camera out of its cardboard box, the stock settings are rarely set up to give you the prettiest look. Making a few quick, intentional changes inside the menu screen right away saves you from a lot of letdowns later.
Switching Your File Type to RAW
Out of the box, your gear saves images as compressed JPEG files. This keeps file sizes small on your memory card, but it throws away a massive amount of rich color and dark shadow detail. Switching your quality mode to RAW gives you all that raw data back when you sit down to edit on your computer. You can easily fix a bad exposure or a weird color mistake later without hurting the final photo quality at all.
Selecting the Right Autofocus Mode
Stop letting the internal computer guess what you want to snap. Most basic setups come out of the box using an automatic multi-point focus grid that just grabs whatever object sits closest to your glass.
Go into your menu and switch your focus choice to One-Shot AF for static objects, or pick AI Servo AF if you need to track things that run around. Pair this up with Single-Point AF so you can move one little focus square exactly where you want it.
Expert Quote: "So many new shooters think their camera missed focus when the real issue is just motion blur. If your subject moves even an inch, a slow shutter speed leaves the edges looking soft and muddy. Always raise your speed before you blame your lens autofocus." — Senior Studio Photographer Insights
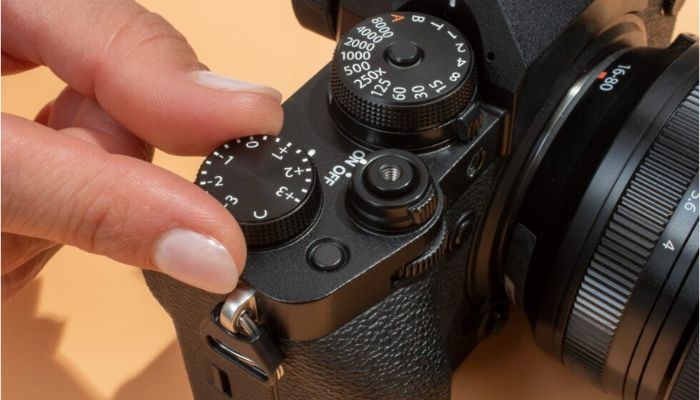
Creative Modes: Selecting the Perfect Dial Position
The top mode dial on your camera has letters that switch how much manual power you hold over your shots. You do not have to jump right into full manual mode to get clean, professional looks.
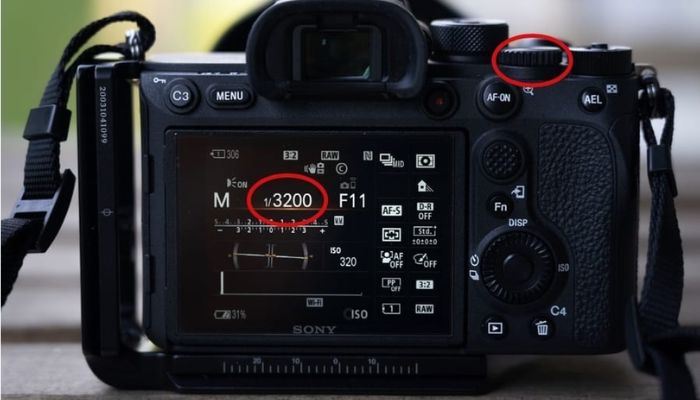
Aperture Priority Mode (Av)
In Av mode, you choose the f-stop value and your camera instantly picks the matching shutter speed for you. This is the absolute best mode for everyday walk-around shooting. It lets you control how blurry your background looks while letting the internal tech do the fast light math on the fly.
Shutter Priority Mode (Tv)
When things move fast, turn that top dial over to Tv. You pick the speed of the shutter window, and the lens blades open or close by themselves to keep the light balanced. This mode works perfectly for kids playing in the backyard, fast sports, or tracking passing cars.
Step-by-Step Guide: Canon Camera Settings for Outdoor Portraits
Shooting pictures of people outside is great, but shifting solar light causes real issues if you are not ready. Using these exact setups helps you lock in sharp skin details and beautiful colors.
| Setting Parameter | Recommended Value | Creative Purpose |
|---|---|---|
| Shooting Mode | Aperture Priority (Av) | Controls background separation |
| Aperture | f/1.8 to f/2.8 | Creates soft bokeh and isolates subject |
| Shutter Speed | 1/200s or faster | Eliminates hand shake and subtle motion |
| ISO | 100 to 400 | Delivers maximum image clarity |
| Autofocus Method | Eye Detection / Servo | Locks focus perfectly onto the eyes |
Dealing with Harsh Sun and Shadows
Bright midday sun leaves heavy, ugly shadows under a person's eyes and nose. To fix this, move your subject into the soft, flat shade of a large building or a tree canopy.
If you have to shoot out in the open sun, place the sun behind the person so it acts as a rim light on their hair. Then, use Evaluative Metering to keep their face bright and soft. This keeps the sky from turning completely white and keeps skin colors looking totally real.
Fine-Tuning Your Colors and Light
Getting your colors right straight out of the camera saves you hours of boring correction work on the computer later. Two simple tools help you do this: White Balance and Exposure Compensation.
Managing White Balance Presets
The Auto White Balance (AWB) tool does a great job most of the time. But mixed light sources can fool the sensor, making your images look way too blue or overly orange.
If you are shooting under a bright blue sky, switch your preset menu to Daylight. If you move into the shadow of a house, change it to the Shade icon. This injects warm tones back into the frame so things do not look cold and ghost-blue.
Utilizing Exposure Compensation
The built-in light meter can occasionally be confused. It can create a bright white snow scene look like a gray snow landscape or a dark black wall look too bright. The Exposure Compensation button (with the +/- symbol) allows you to correct the error quickly. Click it to the plus side for illuminated dark faces—or to the minus side to retain deep and rich shadows.
Helpful Hints for Advanced Composition
Once you feel good about basic light setups, you can turn on some hidden menu tools to make your shooting experience even better.
Activating the Electronic Level and Grid Lines
Crooked ground lines can totally ruin a great shot of a building or a beach horizon. Go into the setup menu and turn on the 3x3 grid display for your screen or viewfinder. This helps you line up shots using the rule of thirds and keeps your lines flat. Many newer cameras even show a digital line that turns green when the camera is perfectly level.
Customizing the Quick Menu (Q Button)
The "Q" button on the back of your camera is like a fast shortcut highway. Instead of searching through long menu lists to change things, pressing this button brings up a clean grid of your favorite tools. Getting used to this layout lets you change settings instantly without ever taking your eye off your subject.
Summary of Actionable Camera Configurations
To make sure you use the right settings on your next weekend photo walk, look at this quick checklist before you start shooting:
- Check the file type: Make sure the menu shows RAW so you have room to edit.
- Match ISO to the light: Use ISO 100 for bright sun, ISO 400 for clouds, and ISO 1600 or more for indoors.
- Pick your focus point: Choose a single focus point instead of letting the camera pick random spots.
- Clear your cards right: Always format your memory cards inside the camera menu instead of deleting files on a computer to keep the card working great.
Frequently Asked Questions
What are the best canon camera settings for everyday use?
For basic walk-around shooting, click your dial to Aperture Priority (Av) mode, pick an f-stop like f/4 or f/5.6, and switch to Auto ISO with a high limit of 6400. Pair that with Evaluative Metering. This setup keeps your shots nice and sharp while your shutter stays fast enough to stop blur if clouds block the sun.
Why do my indoor images look grainy?
You get grain because your camera cranks up the ISO number to catch weak light inside a dark room. To kill the noise, open your lens glass to a lower f-number to let real light spill inside, or slide your shutter to a slower speed if your subject sits still. Flipping on more room lights stops the grain fast too.
Should I use image stabilization on a tripod?
No, click off that lens stabilization switch when you lock your camera onto a heavy tripod. When your camera sits 100% still, those internal stabilizer parts get confused searching for shakes that do not exist. That loop actually makes your final shot look soft.
How do I get a blurry background in my photos?
To get that rich background blur, use a low f-number like f/1.8 or f/2.8, zoom in with a long lens like a 50mm or 85mm, and push your subject way out into the open, far away from any walls or bushes while you stand close to them with your camera gear.