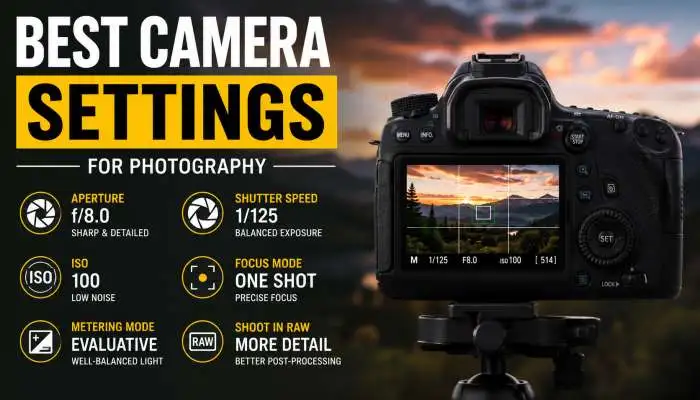
You bought a nice camera. But your pictures still look... meh. They are too dark, too bright, or just blurry. I have been there. For ten years, I shot weddings and nature photos. I learned that the best camera settings for photography are not magic. They are just math and light.
Here is the honest truth: Auto mode is a liar. It guesses. And it guesses wrong a lot. Today, I will open my camera settings for you. We will look at every dial and button. By the end of this guide, you will take photos that look like a pro took them. Let’s get started.
The Best Camera Settings for Photography (Start Here)
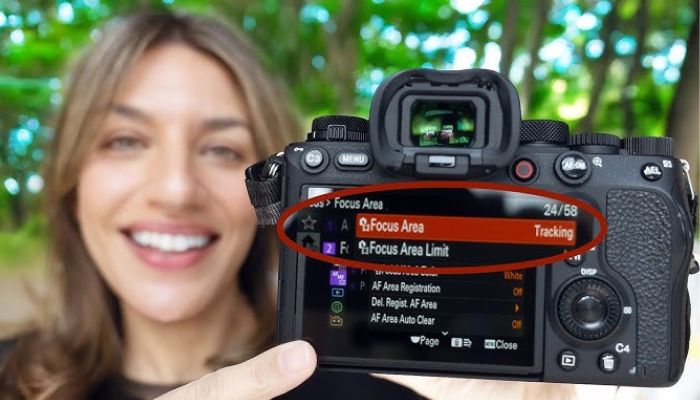
Before you take a single photo, you need to set up your menu. Most people skip this. Do not be that person. These are the best camera settings for photography that work for 90% of situations.
- File Type: Always choose Raw + JPEG. Raw is your digital negative. It saves all the detail.
- Color Space: Use sRGB. It works best for phones and computers.
- Image Stabilization: Turn it ON for handheld. Turn it OFF for tripods.
When I teach beginners, I tell them to spend 5 minutes on this menu. It changes everything.
You may also read :- Digital Camera Tips and Technology for Better Photography
Why "Open My Camera Settings" is the First Real Step
Do you know how to open my camera settings quickly? Every camera is different. But look for a "Menu" or "Q" button. Inside, you will find pages of options. Do not get scared. We only need three things: image quality, ISO, and focus.
Most students tell me, "I never opened that menu before." "That is okay! Today we open it together. Look for the wrench icon or the camera icon. That is where the gold lives.
DSLR Camera Settings Chart for Visual Learners
Sometimes you need a map. Here is a simple DSLR camera settings chart for common scenes:
| Scene | ISO | Aperture (f-stop) | Shutter Speed |
|---|---|---|---|
| Sunny Day | 100 | f/8 | 1/125 |
| Cloudy Day | 400 | f/5.6 | 1/250 |
| Portrait (Face) | 100 | f/2.8 (Blurry background) | 1/200 |
| Sports (Running) | 800 | f/4 | 1/1000 |
| Night Street | 1600 | f/2.8 | 1/60 |
Save this chart to your phone. It is a lifesaver. When you feel lost, just look at the chart. It tells you exactly where to turn your dials.
Camera Settings for Best Quality (Pro Level)
You want sharp, clean images. You want camera settings for best quality. The secret is balance. If you turn one dial, you must turn another.
Expert Tip from Sarah Jones, Pro Photographer:
"Amateurs worry about the brand of the camera. Pros worry about the light. The best setting is always the one that lets in the most clean light."
To get the best quality, you need to control noise. Noise is those little ugly dots in your picture. High ISO creates noise. Bright light kills noise. Always shoot with the lowest ISO possible.
Low ISO = Clean Pictures (The Golden Rule)
Keep your ISO low. ISO 100 or 200 is perfect for daytime. ISO 400 is great for shade. ISO 800 is for dark rooms. If you go above 1600, your quality drops fast unless you have a very expensive camera. I once shot a concert at ISO 6400. The photos were grainy. I learned my lesson. Now, I bring a flash or a tripod. Do not rely on high ISO. Rely on light.
Fine-Tuning Sharpness in Your Menu
Inside your menu, find "Picture Style" or "Sharpness." Set it to +1 or +2. Cameras are lazy out of the box. They make soft images. Boosting sharpness helps your subject pop. But do not go to +5. That makes fake, crunchy lines around heads. Keep it natural.
The Exposure Triangle Explained for Beginners
You have heard this word: the exposure triangle. It sounds scary. It is just a triangle with three corners. The corners are ISO, aperture, and shutter speed.
Think of a window.
- ISO is your sunglasses (how sensitive your eye is to light).
- Aperture is how WIDE the window opens.
- Shutter speed is how LONG the window stays open.
When you change one corner, you must change another to keep the picture bright. If you make the window open very fast (fast shutter), you need to open it wider (big aperture) to get the same light.
Aperture Priority Mode (Your New Best Friend)
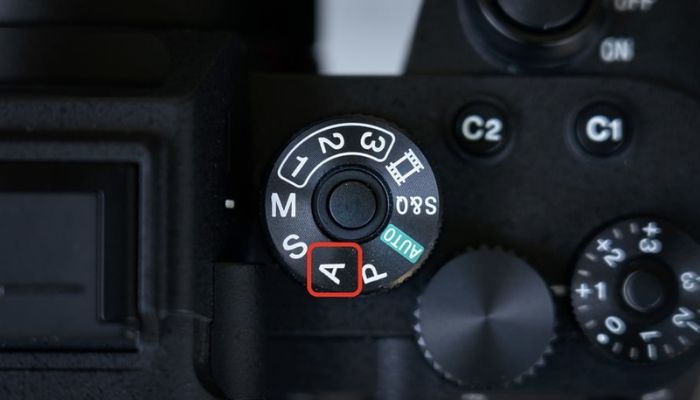
Set your dial to "A" or "Av." This is Aperture Priority. You pick the f-stop. The camera picks the speed. This is one of the best camera settings for photography for beginners because you only think about one thing: the background.
- Low number (f/1.8): Blurry background. Good for faces.
- High number (f/11): Everything sharp. Good for mountains.
I use this mode 80% of the time. It is fast. It is smart. And it teaches you how light works.
Shutter Priority for Moving Subjects
Set your dial to "S" or "TV." You pick the speed. "The camera picks the aperture. "Use this for sports, cars, or kids running.
- 1/500 or faster: Freezes motion (splash water, birds flying).
- 1/30 or slower: Creates motion blur (waterfalls, city lights).
If your subject is moving, never go below 1/125. Otherwise, you get "ghost arms."
Focus Settings That Never Miss
A blurry face ruins a perfect photo. You need the right focus settings. Modern cameras are smart. But you have to tell them what to focus on.
There are two types of focus:
- Single (One-Shot): For things that sit still (flowers, buildings).
- Continuous (AI Servo): For things that move (dogs, cars).
The Magic of "Back Button Focus"
This is a pro trick. Usually, you press the shutter button halfway to focus. That is slow. Change your settings so that a button on the back of the camera (AF-ON) does the focusing.
Now, your thumb focuses. Your index finger shoots. They work separately. You never miss a shot because the camera refocused on the wrong thing. Look up your camera model + "Back Button Focus" on YouTube. It takes two minutes to set up.
Single Point vs. Auto Area
Do not use "Auto Area" focus. The camera always picks the brightest or closest thing. That is usually the background or a tree branch.
Switch to Single Point AF. You see one little red box on your screen. Move that box onto the person's eye. Now the camera only focuses on the eye. This makes portraits look expensive.
Metering Modes Explained
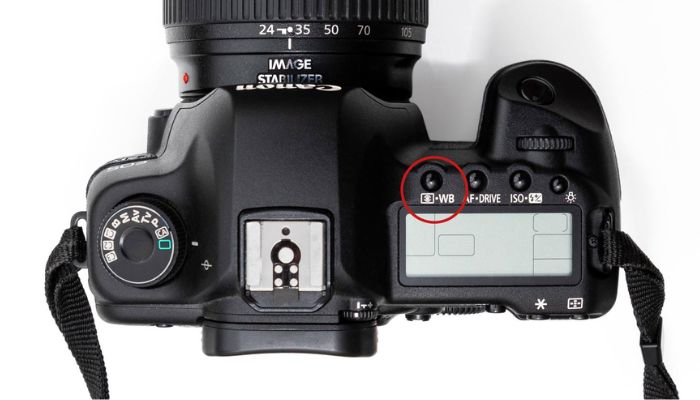
Metering modes tell your camera how to measure light. Is the whole scene bright? Is just the middle bright? Your camera has a tiny brain. You have to tell it where to look.
- Evaluative (Matrix): Looks at the whole picture. Good for landscapes.
- Center-Weighted: Looks at the middle. Good for group photos.
- Spot Metering: Looks at a tiny dot (2% of the frame). Good for the moon or a backlit face.
Why Spot Metering Saves Sunsets
Let us say you take a photo of a friend standing in front of a bright window. Evaluative metering sees the window light and makes your friend dark (a silhouette). That is bad.
Switch to spot metering. Put the dot on your friend's face. The camera ignores the window. Now your friend is bright and happy. This is a huge "aha!" moment for new photographers.
Best Camera Settings for Photography for Beginners (Simple Mode)
If you are just starting, do not use Manual (M) mode yet. It is too much math. Here are the best camera settings for photography for beginners that guarantee a "keeper" every time.
- Turn the dial to "P" (Program Mode). The camera sets the exposure. You just focus and shoot.
- Set ISO to "Auto" (100-6400 range). Let the computer handle the dark spots.
- Set Focus to "Single Point" + "One-Shot."
- Set White Balance to "Auto." Modern cameras are great at guessing color.
My opinion: Do not feel bad about using "P" mode. I used it for six months. It let me learn composition and framing without stress. You have to walk before you run.
Learning the Light Meter (The Little Scale)
Inside your viewfinder, there is a little scale that looks like this: -3...-2...-1...0...+1...+2...+3 This is your light meter. If the arrow is at 0, your photo is perfectly bright. If it goes to -2, it is too dark. If it goes to +2, it is too bright. In "P" mode, this is always at zero. In "M" mode, you turn the dials to move the arrow to zero. That is literally all manual mode is: moving the arrow to zero.
Essential Pro Tips for Real Life
Theory is nice. But life is messy. Here are essential pro tips that work in the real world.
Essential Pro Tip #1: Check Your White Balance Indoors.
Homes have yellow lights. Cameras see yellow. Your white skin turns yellow. It looks sick. Set white balance to "Tungsten" (light bulb icon) to remove the yellow.
Essential Pro Tip #2: Shoot in Burst Mode.
Set your drive mode to the icon of three squares stacked. This takes 5 photos per second. If you take one photo of a kid smiling, they will blink. If you take 10 photos, one will be perfect. Burst mode is magic.
Essential Pro Tip #3: The Histogram Never Lies.
Your camera screen lies in sunlight. The histogram is a graph. If the mountain is touching the left wall, it is too dark. If it touches the right wall, it is too bright. Learn to read the graph, not the screen.
How to Practice These Settings
You read 1,500 words. Now you need to practice. Do not bring your camera to a birthday party yet. You will get stressed.
The 30-Minute Drill:
- Minute 0-5: Sit on your couch. Find every button mentioned here.
- Minute 5-15: Go outside. Put a toy on a table. Use Aperture Priority (A). Take a photo at f/4. Take another at f/16. Look at the background difference.
- Minute 15-25: Go inside a dark room. Use Shutter Priority (S). Take a photo at 1/30 (it will blur). Take one at 1/100 (it will be dark). See the difference.
- Minute 25-30: Put everything back to Auto ISO and Program (P) mode so you are ready for tomorrow.
Do this drill three times this week. I promise you will stop being afraid of your camera.
Final Words from My Experience
I have dropped cameras in rivers. I have missed the winning goal shot. I have cried over lost photos. But I have also sold prints for $500. Photography is a journey.
Do not try to memorize all the best camera settings for photography at once. Pick one setting today: ISO. Just ISO. Tomorrow, learn Aperture. By Friday, you will be the person your friends ask to take the Christmas card photo. Go grab your camera. Open the menu. Change one thing. You have got this. Now go take some beautiful pictures.
Frequently Asked Questions
Q1: What is the single best camera setting for photography for indoor events?
Use Aperture Priority (A/Av). Set your aperture to the lowest number your lens allows (like f/2.8 or f/4). Set your ISO to Auto (max 3200). The camera will keep your shutter speed fast enough to stop motion. This works for birthday parties and family dinners every time.
Q2: Why are my photos grainy even when I use the right settings?
You likely have "High ISO Noise Reduction" turned OFF, or you are cropping too much. Go into your menu and turn Noise Reduction to "Low" or "Standard." Also, remember that underexposed photos (too dark) become grainy when you try to brighten them on a computer. Get the exposure right in the camera first.
Q3: Do I really need to shoot in RAW format?
Yes. 100% yes. JPEG is a finished meal. You cannot change the recipe. Raw is the grocery bag. You can adjust white balance, exposure, and shadows perfectly later. If you do not edit photos, stick with JPEG. But if you want the best camera settings for photography quality, always hit Raw.
Q4: My camera keeps hunting focus (going in and out). What do I do?
You are trying to focus on a blank wall or a clear sky. The camera needs contrast (a dark line next to a light line). Find an edge. For example, focus on the edge of a table, not the middle of the table. Or switch to Manual Focus (MF) on the lens.
Q5: Should I buy an expensive lens or a new camera body?
Buy the lens. Always. A 500 lens camera with a 1,000 lens beats a 3,000 camera with a 3,000 camera with a 200 lens. Glass (lenses) is where the magic lives. The camera body is just a box that records light. The lens collects the light.