Depth of field (DoF) is one of the most important concepts in photography. Understanding what DoF is, and knowing what factors affect it, are things all photographers should master. Many photographers know that you can control DoF by adjusting aperture. But did you know that DoF is influenced by other factors too? In this article, I want to explain in simple terms what depth of field is and talk about the ways you can control it.
What is Depth of Field?
Depth of field is the distance between the closest and farthest objects in a photo that appears acceptably sharp. Now your camera can only focus sharply at one point. But the transition from sharp to unsharp is gradual, and the term ‘acceptably sharp’ is a loose one! Without getting too technical, how you will be viewing the image, and at what size you will be looking at it are factors that contribute to how acceptably sharp an image is. It also depends on how good your vision is!
Scientifically, it is based on something called the circle of confusion. This involves more physics than I’m going to get into here! Spencer talks about it in his article “Hyperfocal Distance Explained.” So check that out for more of the technical details if you are so inclined.
Depth of field is governed by a combination of:
- The f-stop at which the photo is made.
- The focal length of the lens used to make the image.
- The distance the main subject is from the camera.
- The distance between the subject and the background.
With all aspects being equal, the smaller the lens opening, the greater the depth of field. For example, if photo A is made at f/5.6 and photo B is made at f/22, depth of field is greater at f/22, so photo B will have more planes in sharp focus.
With all aspects being equal, it’s easier to show greater depth of field with wide angle lenses than it is with a telephoto. For example, if photo A is made with a 24mm lens and photo B is made with a 200mm lens, it’s easier to bring foreground to background elements into sharp focus with the 24mm lens. Photo A will have more planes in sharp focus.
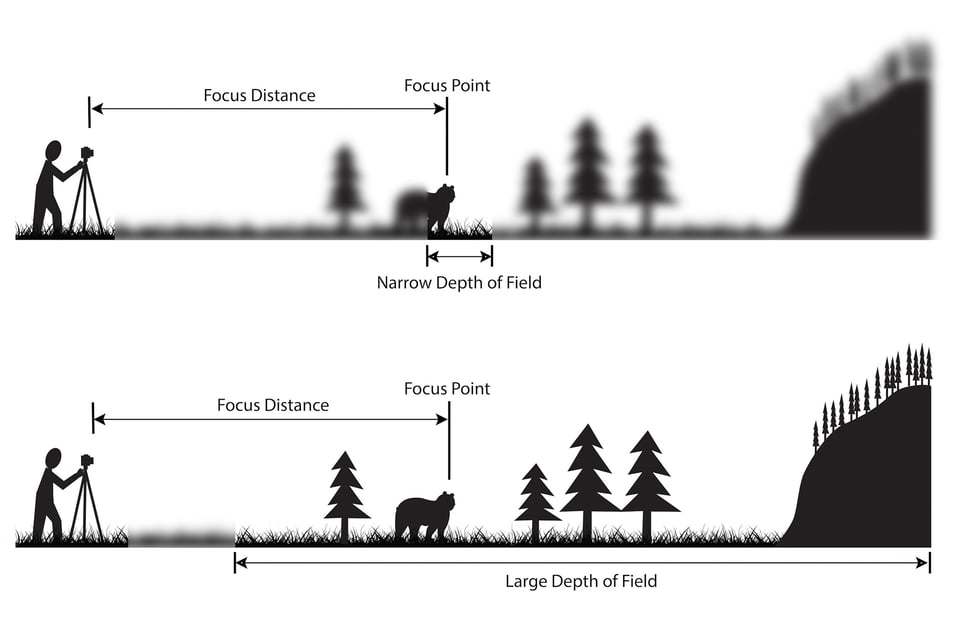
In regard to main subject distance from the camera, if I stand on a mountain top and point a 50mm lens at the vast scenery, since all subject matter is at infinity, everything is sharp even with a wide-open aperture (f/2.8) because once subject distance reaches infinity, it doesn’t matter if it’s 200 feet away or 500 yards away.
In regard to subject distance from its background, the farther away the subject stands from what’s behind it, the easier it is to throw the background out of focus. For example, if I use a 100mm lens to make a portrait of a friend, but he or she is only a few feet in front of bushes and flowers, regardless of the aperture at which I set the lens, the background will show detail. On the other hand, if I move the person 50 feet from the background and use a wide-open aperture, I can control how much of the background comes into focus. For a portrait, it’s good to have the subject be the only plane that’s sharp—it allows it to stand out. The background doesn’t compete with the subject.
Photo Demonstration
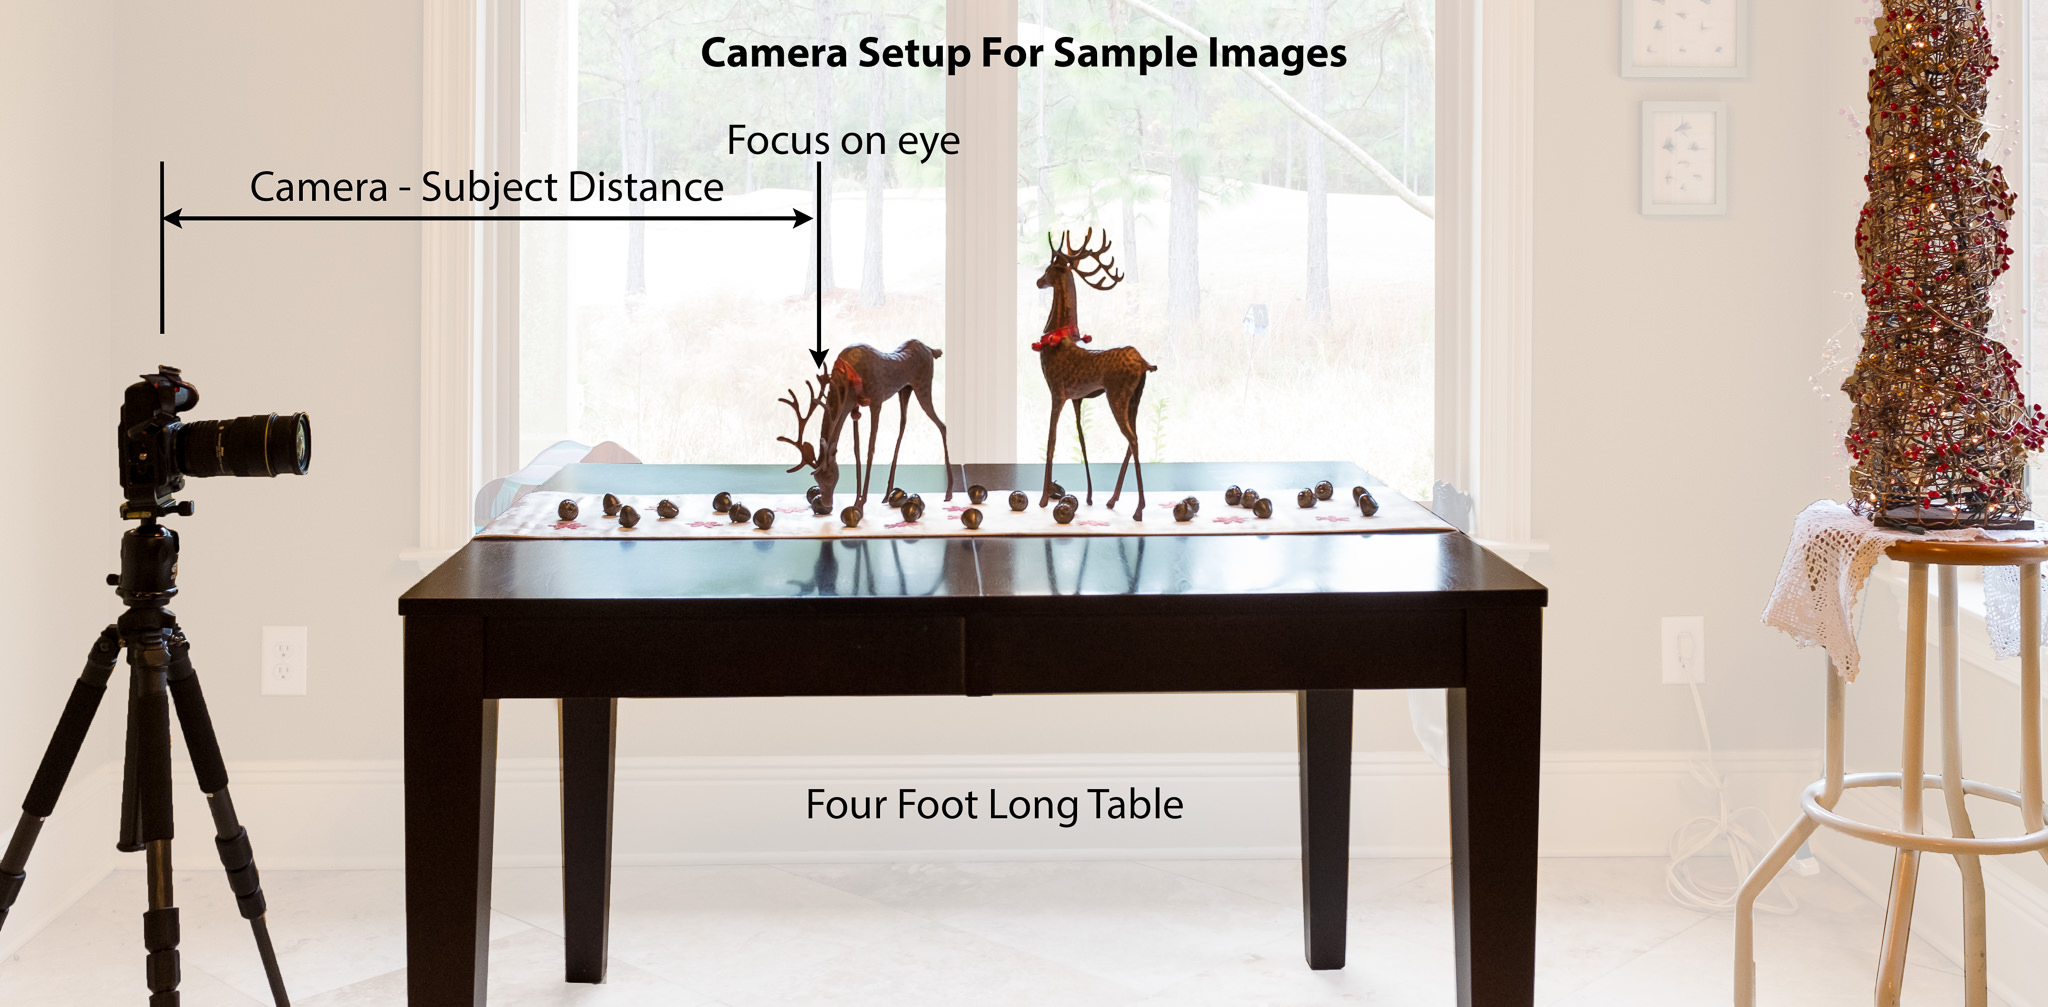
Now let’s show some example photos of how to change depth of field for a given scene. Before everything else, I wanted to show you the setup I used to take the sample images in this article. Hopefully, this will give you a bit more insight into the photos and a better feel for the distances between the objects I was shooting. To change the camera-subject distance, I moved my tripod closer/farther away from the props. All of the test images were shot with the same camera, a Nikon D500.
Why is it good to control focus planes? It seems natural that a photographer would want to produce pictures with a wide range of focus, but this isn’t always true. If every plane in the image is tack sharp, it tells the viewer every detail on every plane is important. Conversely, if only certain planes are sharp, the viewer is drawn to them and other elements become secondary. For most landscapes, they’re better when everything is sharp from the foreground to the background. But for most portraits and some other subjects, the image is more successful if just the main subject is sharp and the remaining planes fade into softness.
Wildlife Strategies
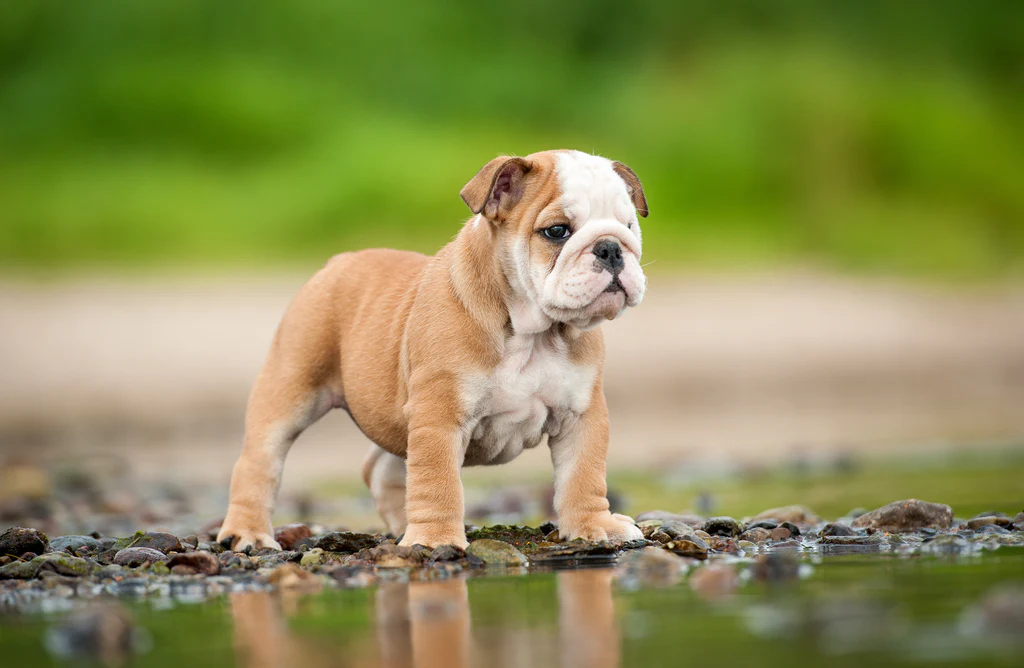
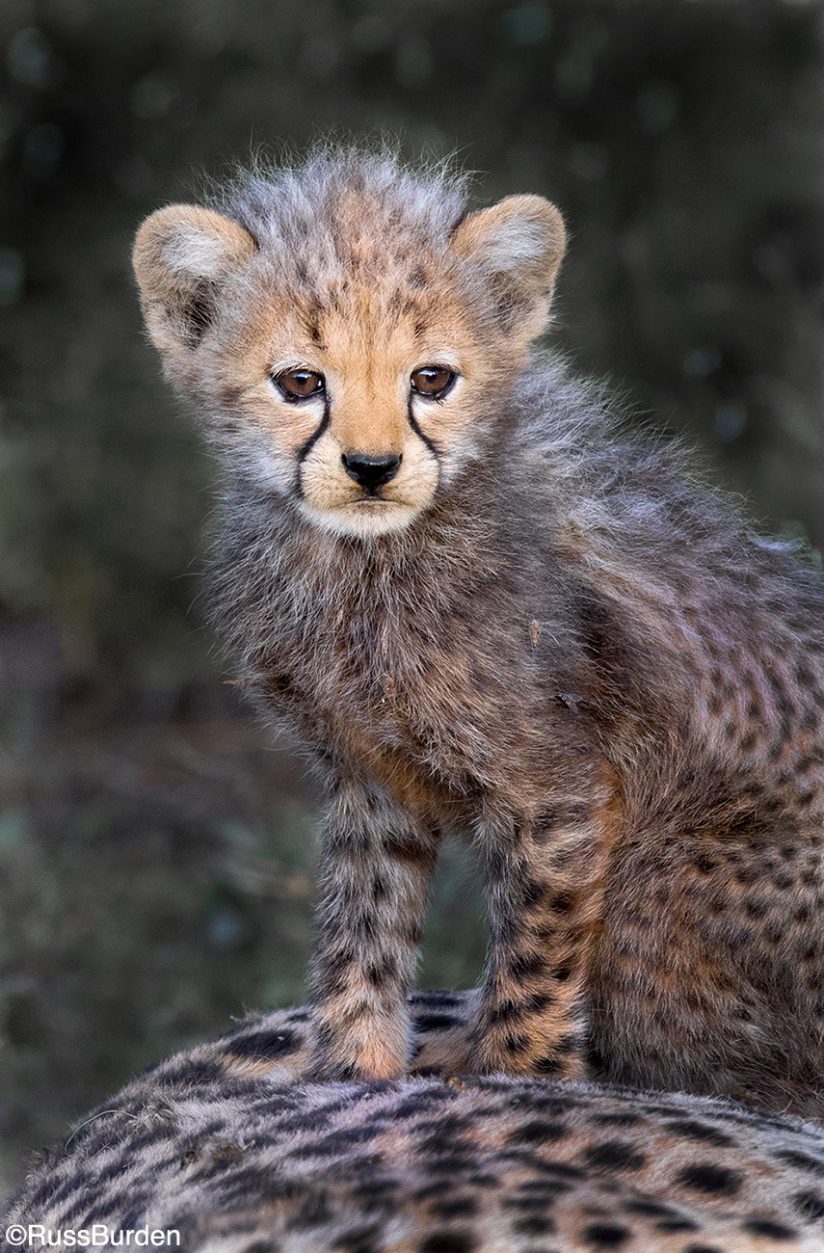
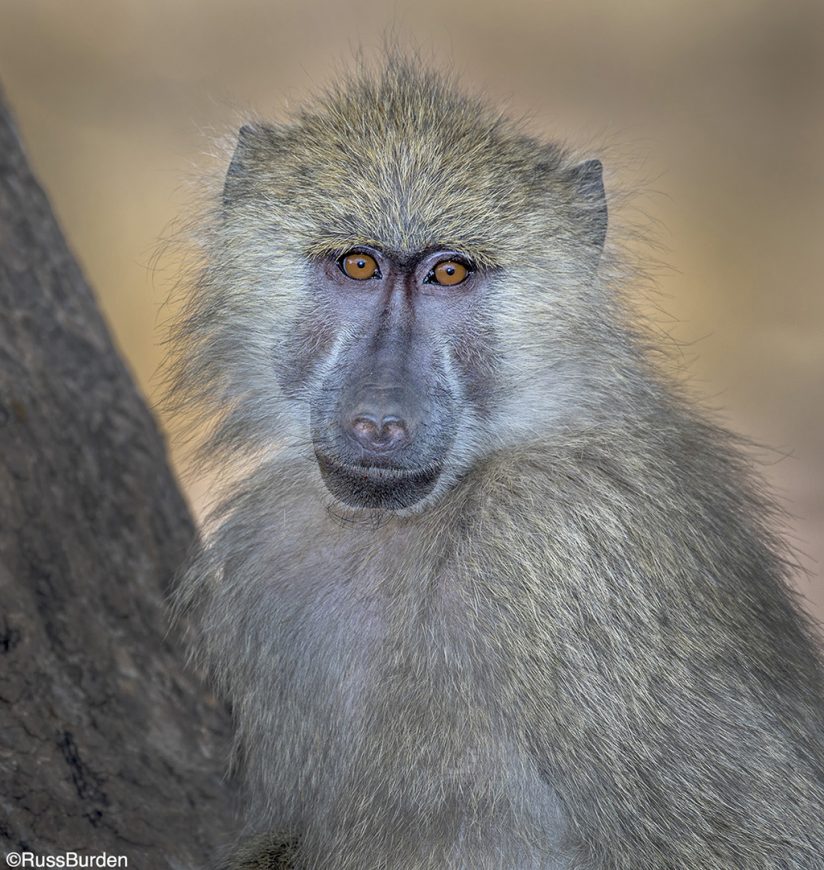
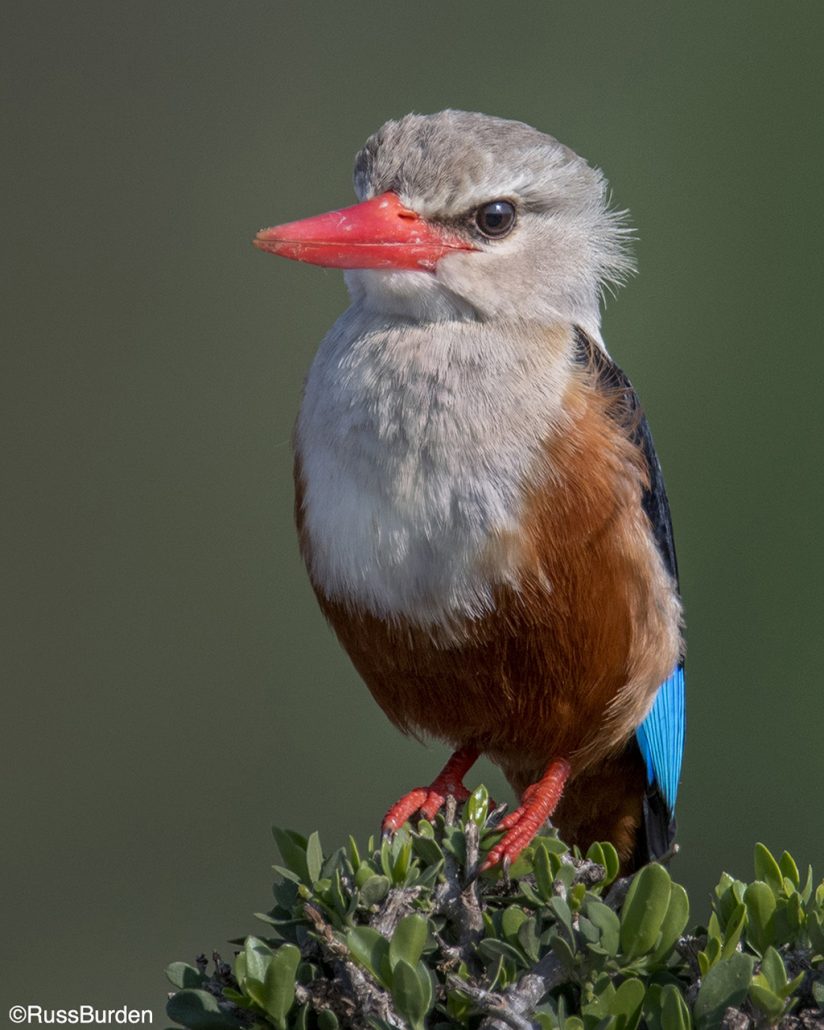
Use a telephoto lens and a wide-open aperture. The longer the lens and the more wide open it is, the more you narrow the depth of field. This is beneficial in regard to wildlife in that it works well to have an out-of-focus background and a tack sharp animal so it pops off the page. Look for situations where a subject is far enough away from the background so it can be thrown out of focus. If the proximity between the subject and background is small, no combination of focal length and aperture can throw it out of focus. With the above being said, create the opposite wherein you depict the animal in its environment—known as an environmental portrait. Grab a wider lens as if you were about to make a scenic and include the wildlife subject to show it in its habitat.

Landscape Strategies
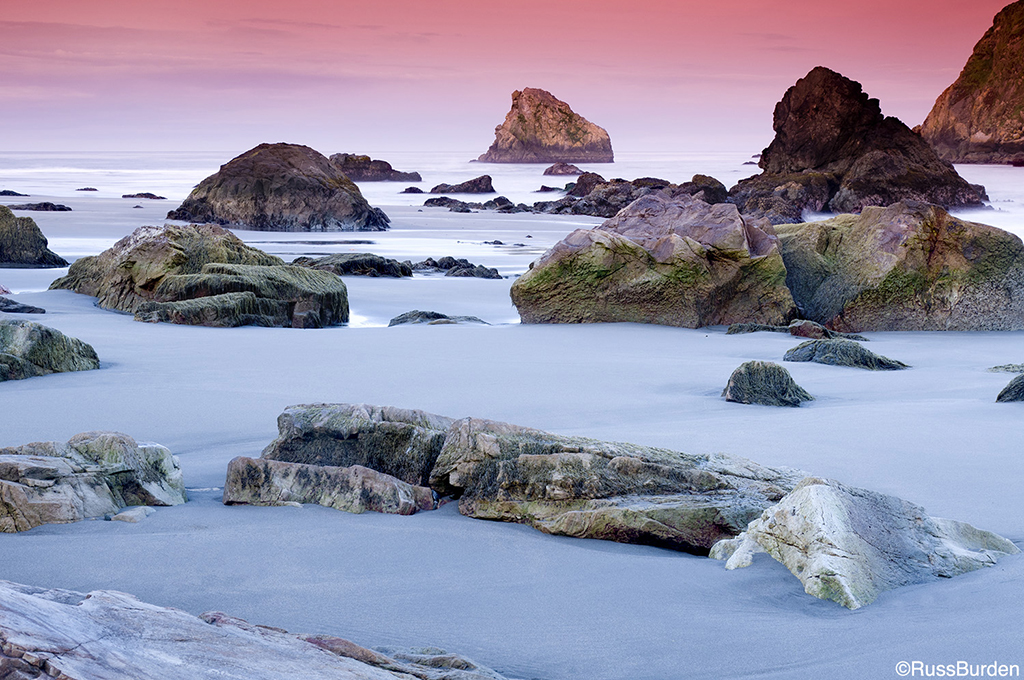
Use a wide-angle lens with the aperture set to f/22 to obtain maximum depth of field. Try to include a foreground element that’s fairly close to the front element of the lens. With the camera on a tripod, create the composition. Since there’s a close foreground element, everything from that subject out to infinity needs to be sharp. Turn off autofocus so the point at which the lens is focused is a bit past the foreground subject—the rule of thumb is to place the point of focus one-third into the composition. Use a cable release so camera movement isn’t introduced and make the photo.
To learn more about this subject, join me on a photo safari to Tanzania. Visit www.https://www.theshutterclub.com/ to get more information.