In this video and article, we’re going to work through some of the nuances of maternity portraits in regards to lighting and posing. If you’re interested in learning more about how to capture maternity portraits, be sure to check out the full workshop over at SLR Lounge.
Before you pick up your camera or reach for your flashes, check out our C.A.M.P. framework and simplify your lighting process.
Composition: What do we want our scene to look like? Where do we want the camera to be? What’s the angle? What do we want our subjects to be doing?
Ambient Light Exposure: Choose the intention of the scene. Do we want a dramatic image (darkening the ambient light and using more flash) or do we want a softer image (brightening the ambient light and using a more natural power of flash)?
Modify/Add Light: Are your subjects visible in the frame or do they need to be chiseled out? Do you need to add an additional light source?
Pose & Photograph: Take your shot!
Step 1: Compose the Shot
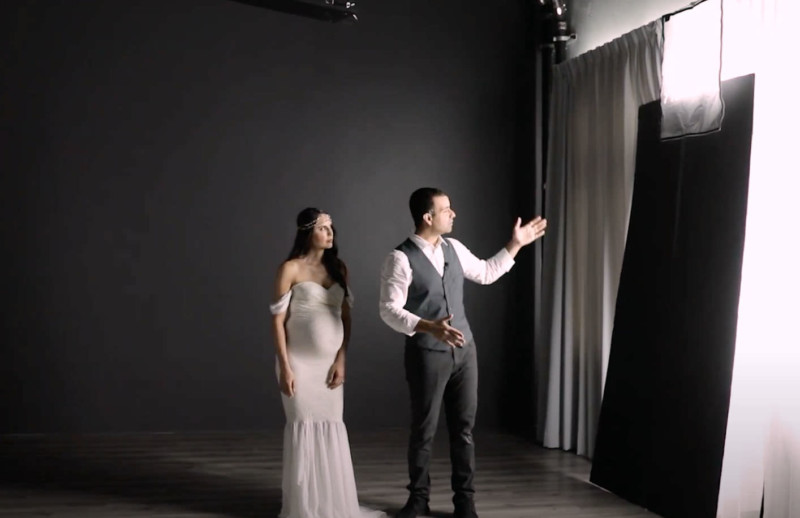
We’re lucky enough to have a large open studio space with big windows and a clean backdrop, which is great for shots like these. Taking advantage of that opportunity, I chose to shoot most of these images vertically and I left plenty of space around my subject.
Step 2: Dial In Ambient Exposure

Think about the mood you want to set when determining your lighting. Most people associate a bright and airy look with natural light photos, but you can use natural light to capture dramatic images as well, as you can see in the example images throughout this article.
This lighting setup is simple and can be used anywhere, including at home, in wedding venues, and so on. All you need is a simple backdrop and a window with both sheer and regular curtains, if possible, which we’ll use to make a strip box. For this shoot, we also added a V-flat to bounce more light from the window back onto our subject.
Step 3: Modify the Light Source

Because we’re using natural light through the window, the modification really comes from a few places. First, we’re using sheer curtains to soften the light coming through the window, and we’re using dark curtains as flags to keep the light from spilling in unwanted areas across the studio. We also used a V-Flat to kick light back onto the subject and minimize shadows.
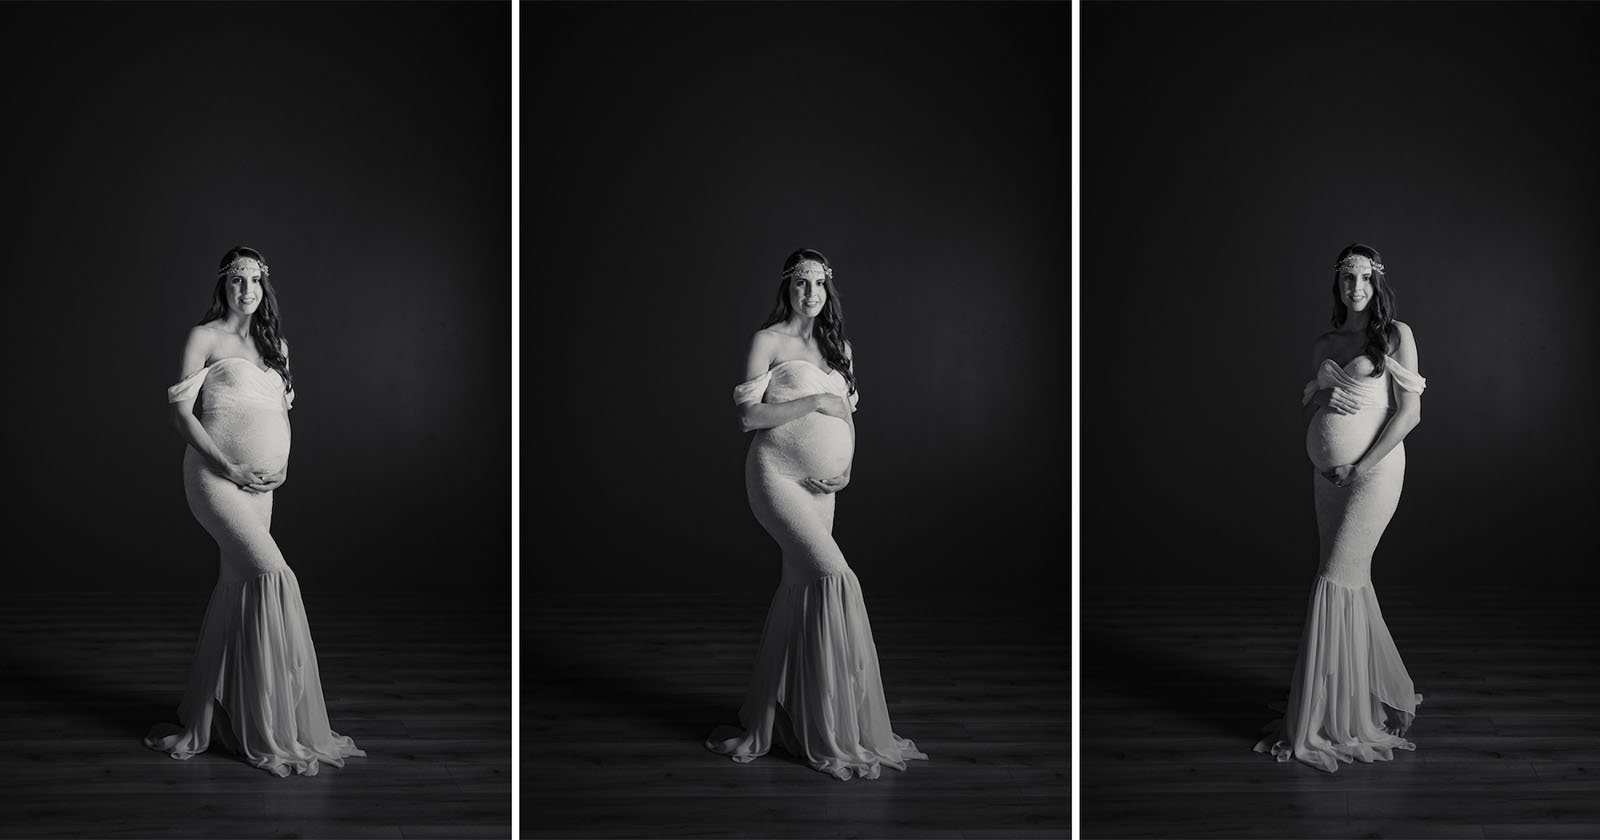
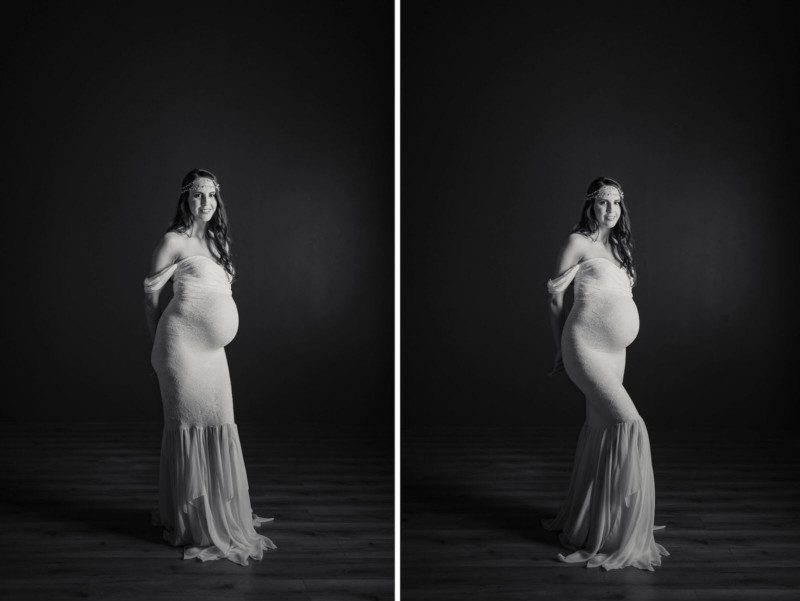
The last modification has more to do with posing, but I’ll mention it here. The direction that the subject is facing will make a difference in terms of revealing curves. Both examples shown above accentuate the curves of the subject’s belly and body but to different effect. The image on the right, for example, has an edgier, more dramatic look to it. Make sure to look closely at details like these and then find which look works best for you.
Step 4: Pose Your Subject
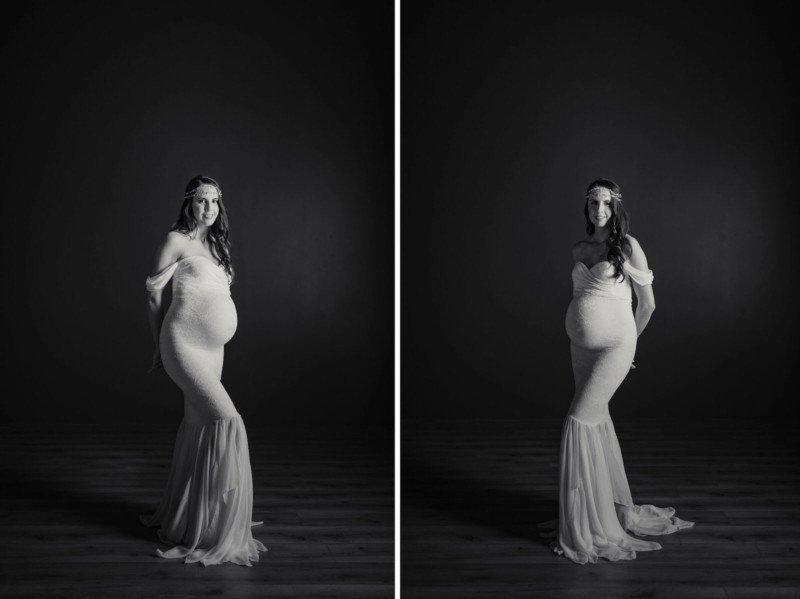
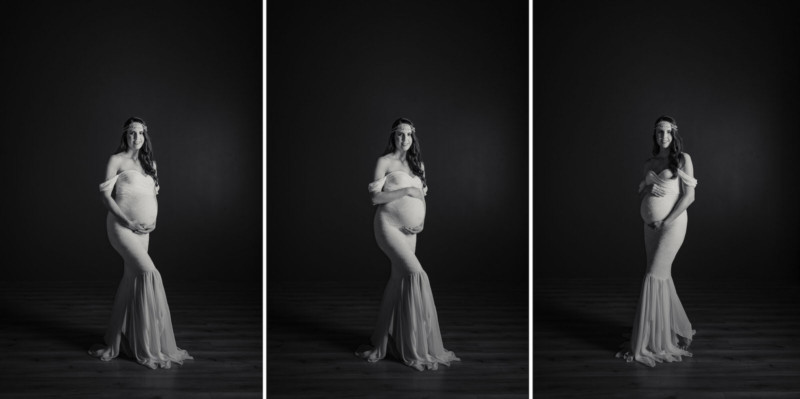
I started with a straight-ahead, baseline shot to illustrate what a difference a few key adjustments can make when posing, especially for a maternity session.
Here’s a breakdown of how I refined the pose to transform from a not-so-good portrait to a deliverable image (see the images above).
1. In the first pose, the subject stood with her feet shoulder-width apart and directly faced the camera. I consider this is a what-not-to-do pose for a maternity session.
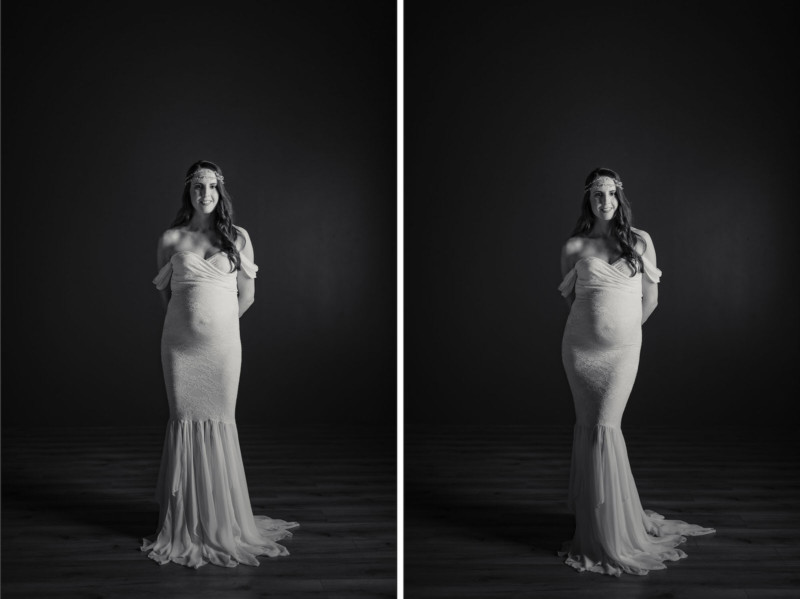
2. I then asked the subject to hold her hands behind her body in order to accentuate her hips.
3. From there, I asked the subject to kick her hips to one side (which side doesn’t matter – whatever is most comfortable for the subject); however, it’s important to make sure the subject isn’t leaning with her hips away from the camera. This can de-emphasize the hips and
4. Once the hips are kicked to one side, the subject’s feet should come together with one knee drawn in to hang over the other knee and create a tapered point in the dress.
5. Next, ensure that the subject is standing up straight and check for details to make sure the dress is laid out nicely.
Pay Attention to Body Type
One thing I’d like to note in this posing guide is that we’re working with a very fit mother. She works out and exercises regularly. The actual hip direction and placement have less to do with the form and figure of mom, and more to do with body type. For some people, leaning toward the camera may look better, even if it doesn’t work for others. Try both directions to make sure that you’re putting your subject into a flattering pose.
Use Hand Placement to Draw Attention
For the images above, we’ve stuck to keeping the subject’s hands behind her back. We can also bring those hands forward to direct our viewers’ eyes to our intended focus point. Here are a couple of different examples.

Conclusion: Maternity Posing Tips
We hope you enjoyed this article/video on posing for maternity portraits. Here’s a quick recap of things to look out for when capturing maternity portraits:
- Decide on your composition
- Set the mood and your intentions by dialing in and modifying (if necessary) your exposure
- Work from the bottom up with posing: (1) Feet position and (2) Bring the toe in with the knee across
- Change angle from away to towards the light source to see which you prefer
- Shift hips towards or away from the camera to see which is most flattering
- Straighten the spine
- Incorporate hands
Once you’ve worked your way through the C.A.M.P framework and checked off the items recapped above, all that’s left is to finish the look in post, ideally using presets for a consistent look. Again, if you want to dive deeper into maternity photography, don’t miss our full workshop.
P.S. Be sure to catch our next episode of Mastering Your Craft on Adorama’s YouTube channel next week! If you want to catch up on all the episodes, make sure you check out our playlist!
About the author: Pye Jirsa is a wedding photographer based in Southern California and the co-founder of SLR Lounge. The opinions expressed in this article are solely those of the author. You can find more of Jirsa’s work here. This article was also published here.